Version Française disponible ici
A bank reconciliation is the matching process between a company’s cash account balance and its bank account balance (displayed on the bank account statement).
Generally, a company prepares bank reconciliations on a monthly basis.
The bank statement received by a company shows :
- the bank account balance at the beginning of the month,
- the deposits recorded by the bank for the account during the period (usually 1 month),
- the withdrawals that have been made from the bank account,
- the ending balance of the account on a specific date.
All transactions recorded in both the company’s records and the bank’s statement (with exact same data) have to be identified as « cleared ».
Bank Reconciliation Process
The manual bank reconciliation is performed directly from the bank account form. (Access path : Cash & Bank Management > Bank accounts > Bank accounts)
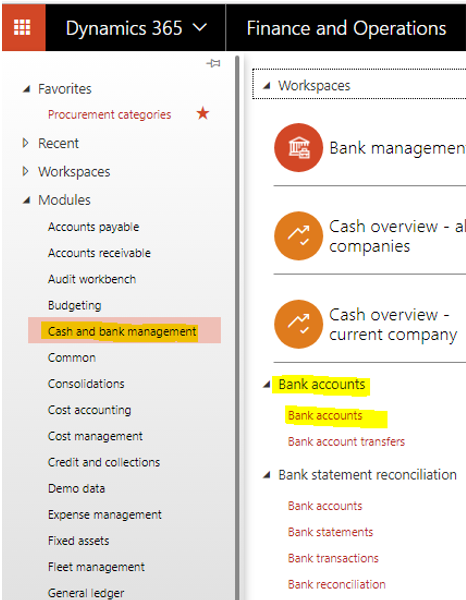
Bank reconciliation in Dynamics 365 enables to:
- enter additional transactions that affect balances (like bank fees or interest charges for example)
- automate the reconciliation process.
Important : it is not possible to reconcile a bank account statement with a bank account if any of the checks or deposit slip payments listed on the statement currently have a status of “pending cancellation”.
You can Initialize Bank reconciliation from the Bank Account form previously opened :
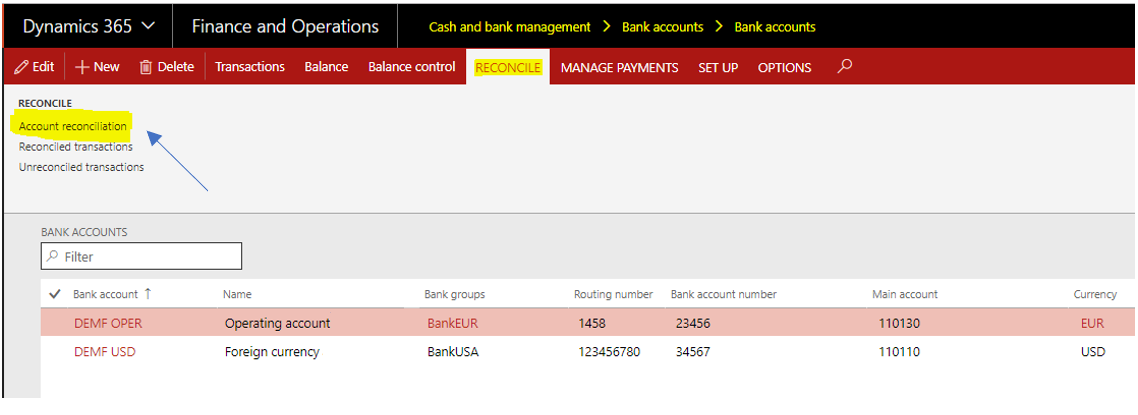
- Select the bank account
- Click “Account reconciliation”
The bank statement opens up as shown below (header data).
The form automatically displays a new line where some fields have to be filled in (in yellow)

Enter the following in the above screen :
- date of the bank reconciliation
- number (= doc reference) in the “bank statement” field
- ending balance
Then click Save
From the former screen, you can now mark cleared transactions :
- click the “Transactions” button
- on the next screen that opens, mark all the transactions that have cleared the bank account by selecting the “Cleared” checkbox
Note : It’ also possible to simultaneously mark a range of check numbers by using the “Mark check interval” button at the top of the form.
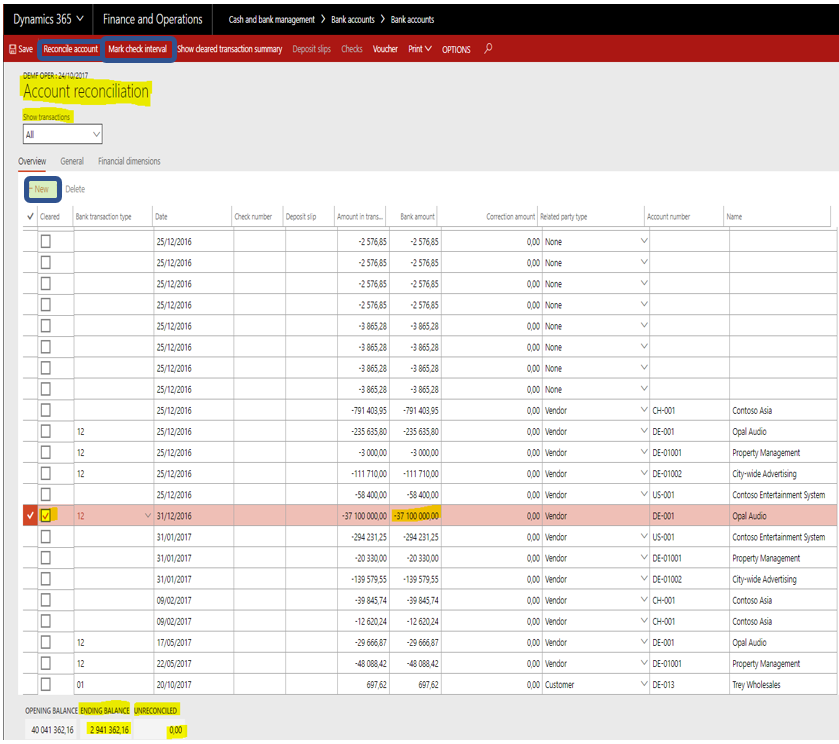
- Mark the transactions in the “Cleared” checkbox until the bank account reconciles and the balance (= “Unreconciled” field) is equal to zero.
- Then click on “Reconcile Account” button (enabled only if “unreconciled” = 0)
In case some bank fees or interest charges (for example) appear on the bank statement, you can add transactions:
- click on the “New” button (see former screenshot, in green) to create a new line
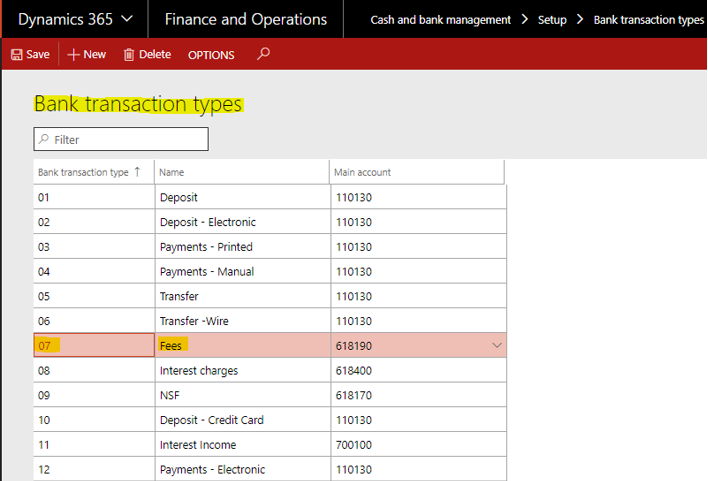
- choose the relevant bank transaction type (in this example, type 7 = Fees)
- enter the amount displayed on the bank statement
- the “Cleared” checkbox is then automatically selected.
As an example, “bank transaction types” can be classified as displayed below
The above explained “bank transaction types” can also be grouped together, thanks to “bank transaction groups”, which can look like the following :
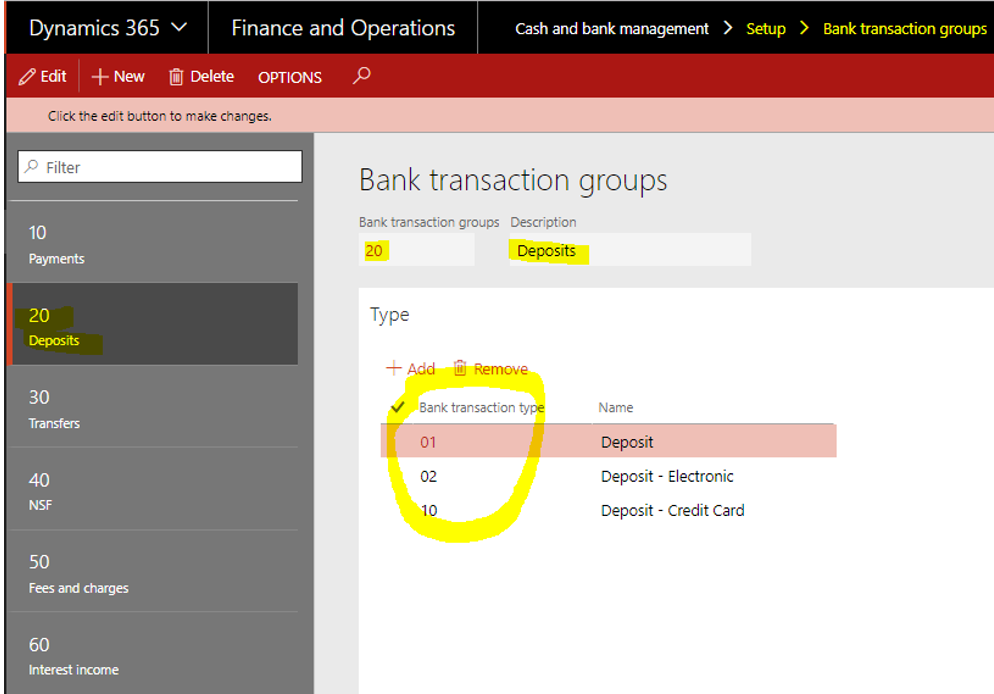
This classification is useful to allow summarized views of reconciliations – as shown further.
Additional functionalities
You can view a summary of transactions. Go in Cash and bank management > Bank accounts > Bank accounts.
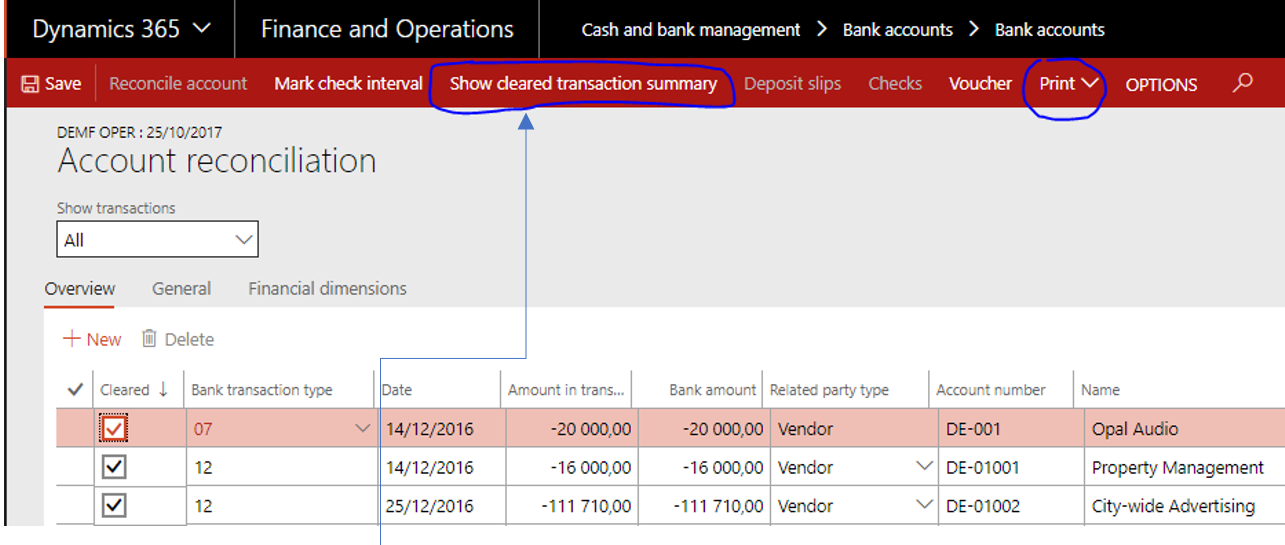
When clicking on the “Show cleared transaction summary” button, on the right of the screen, all cleared transactions are summed up by transaction groups (as mentioned previously).
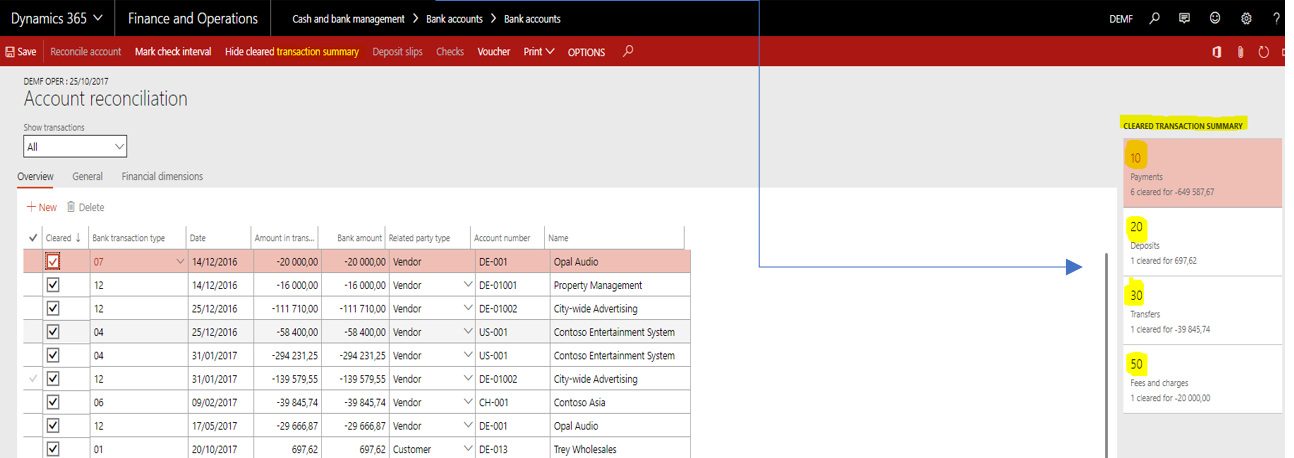
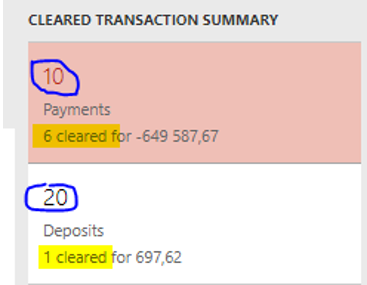
For each transaction group, indicated by its code, are displayed :
- the number of cleared transactions marked during the reconciliation process
- the total amount of the corresponding transactions
The « Print » functionality button enables to print:
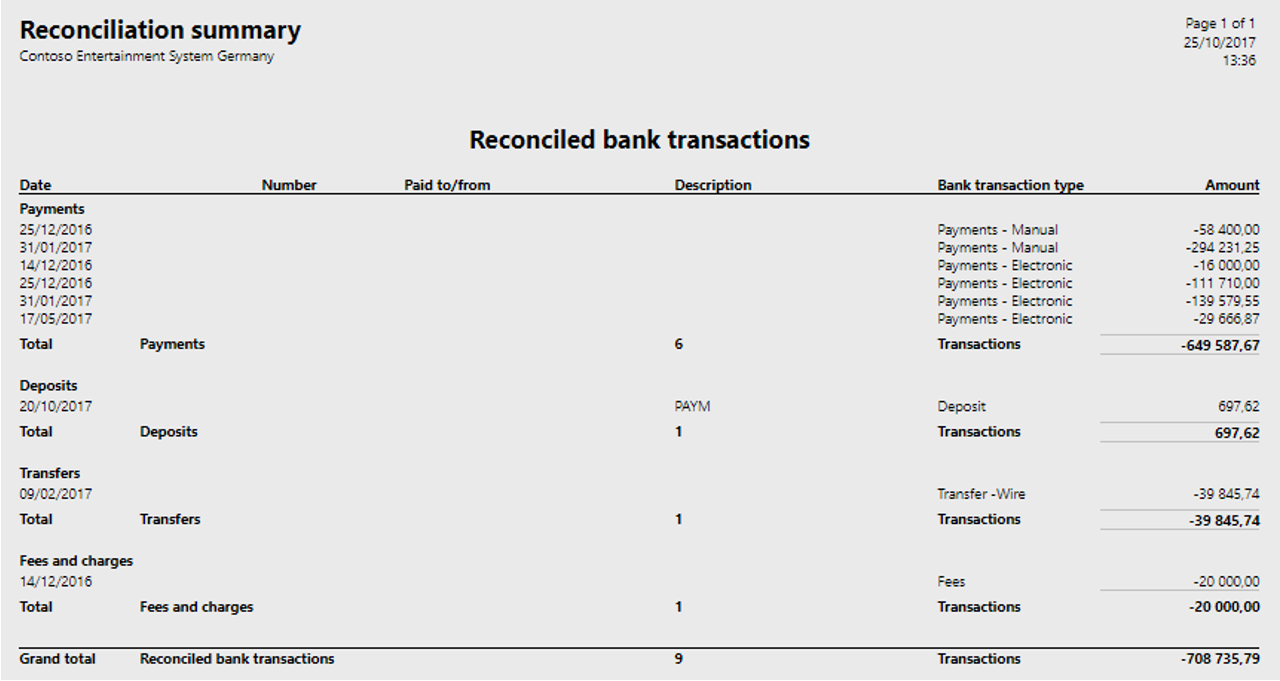
- A reconciliation summary with different selection criteria for expected display
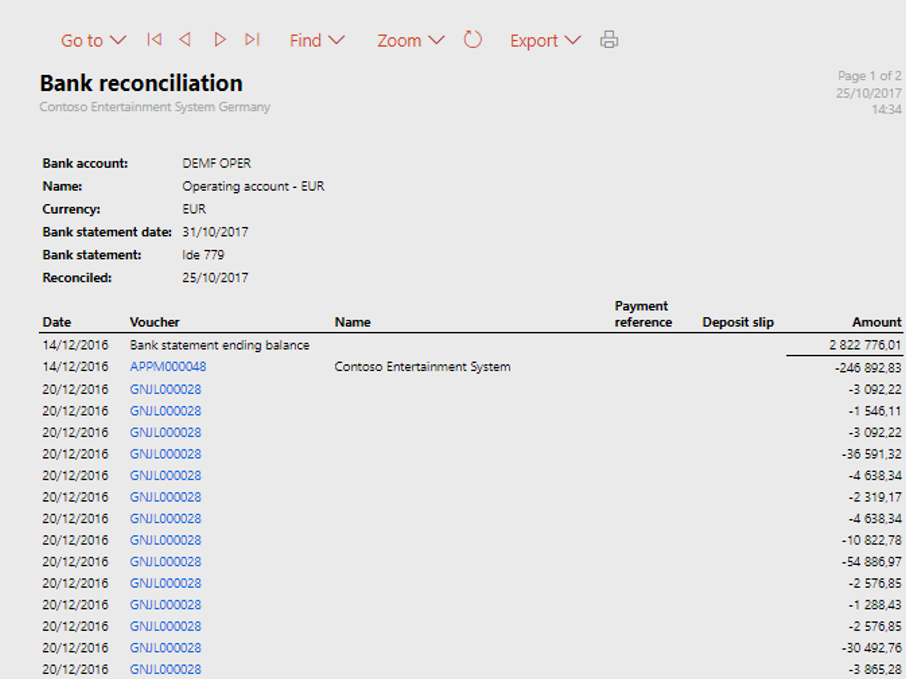
- the detailed bank reconciliation
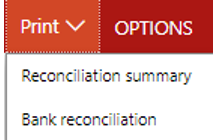
The Reconciliation Summary report :
Case 1 : only “Reconciliation summary” set to Yes.
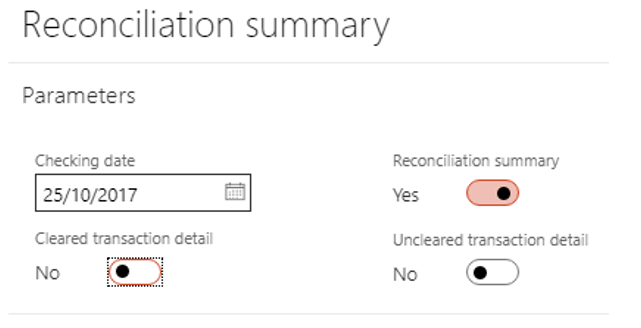
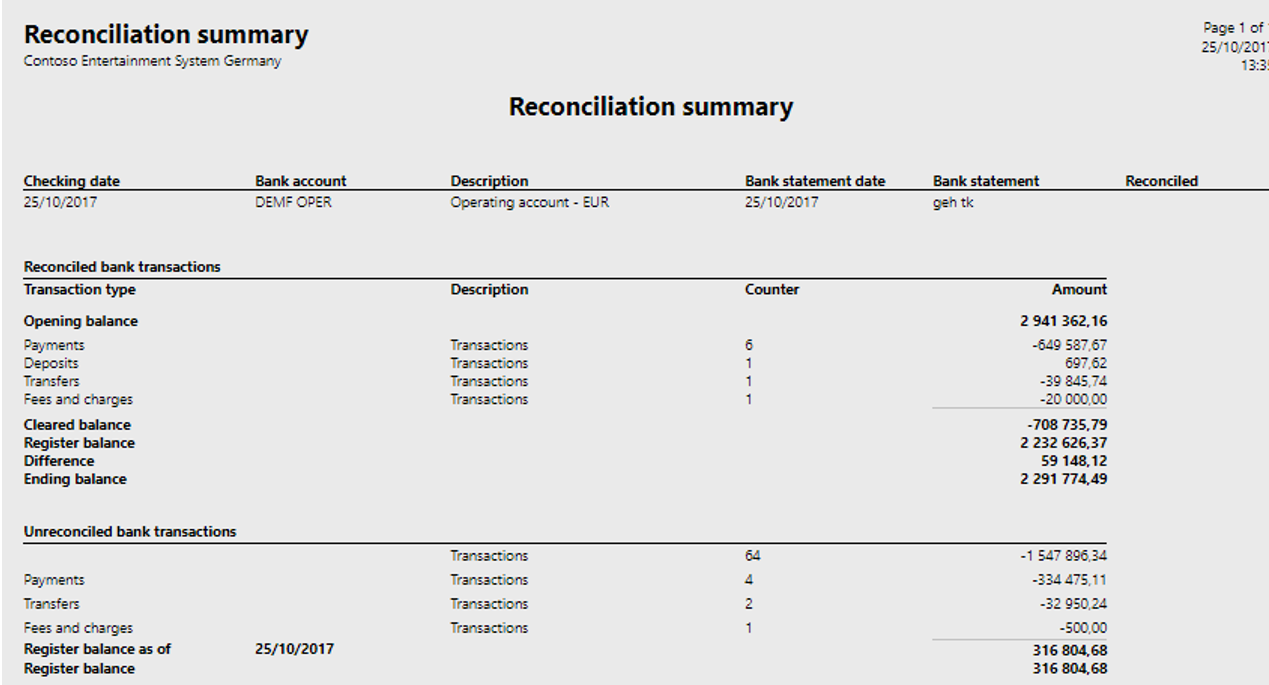
Case 2 : only “Cleared transaction detail” set to Yes.
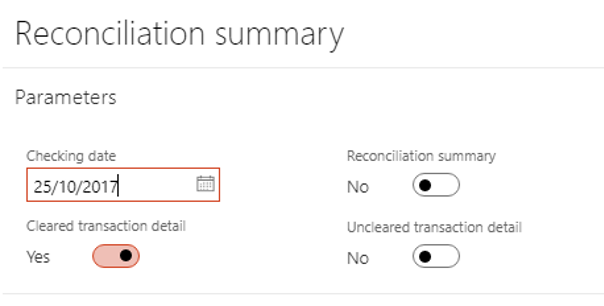
You can also print the bank reconciliation report :
Lise DESPINOY


2 comments