Let’s keep going on digging Microsoft Sustainability Manager. If you wish to review the two first posts please go :
Microsoft Sustainability Manager – Key concepts and overview
Microsoft Sustainability Manager – Data Ingestion
Now let’s see the tricky part which is the process of emission calculations.
What is important to introduce is some terminologies quite well explained in the learn documentations:
- Estimation factor– Provides a way to convert from one unit type to another, such as night stays to kilowatt hour (kWh) used.
- Emission factor– Defines the amount of greenhouse gas that’s emitted by a given unit type, including defining gas emissions such as carbon dioxide (CO2 ), methane (CH4), and nitrous oxide (N20).
- Factor mapping– Provides a way to map reference data to a specific emission factor, simplifying calculation models by allowing customers to choose a reference data type and allowing the system to find the appropriate emission factor.
- Factor library– A collection/grouping of emission or estimation factors and factor mappings that calculation models use.
- Calculation model– Considered the instruction set that the application uses to perform the emission calculations, the calculation model uses factor libraries, factor mappings, and emission/estimation factors to perform the emission calculations.
- Calculation profile– Provides the scheduling for calculation jobs to define activity data filter and the calculation model (instruction set) to use.
To sum up this, all “factor” terms are about unit / conversion and calculation models define how the calcul will be be done. Calculation profil is for running the calcul itself.
Emission calculation process
Let’s take the example of truck emission whitin a dedicated fleet. I’m starting my setup by creating some truck reference data. First I’m defining a new active transport mode.
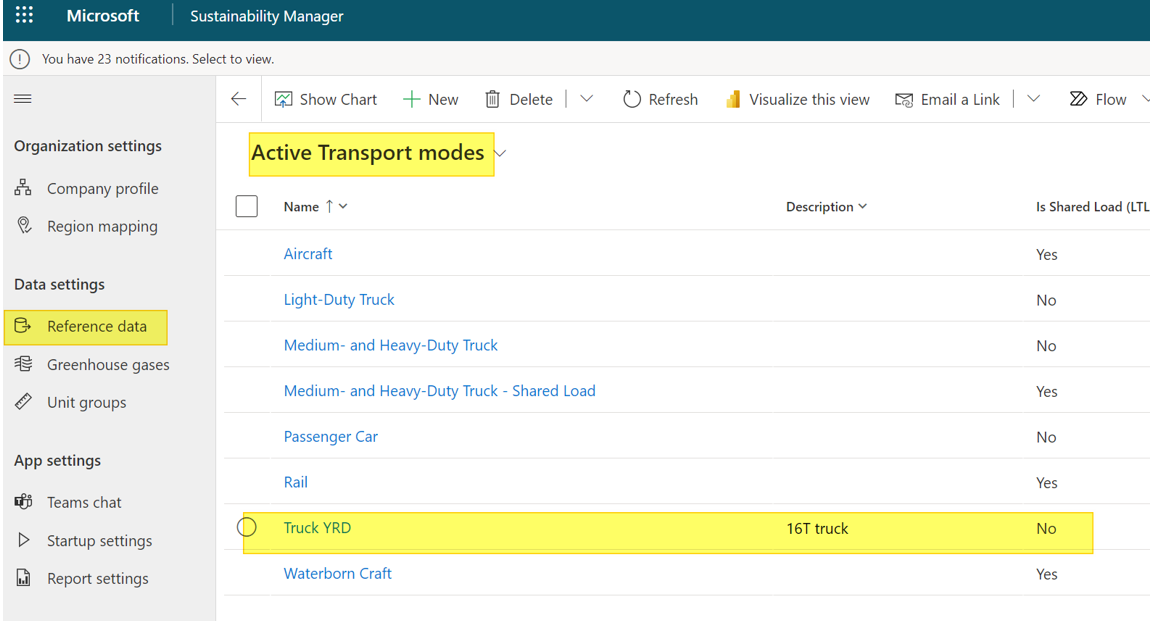
I have also added 2 other Reference data :
- Vehicule type : TRUCK1-YRD, TRUCK2-YRD
- Fuel type : SP95
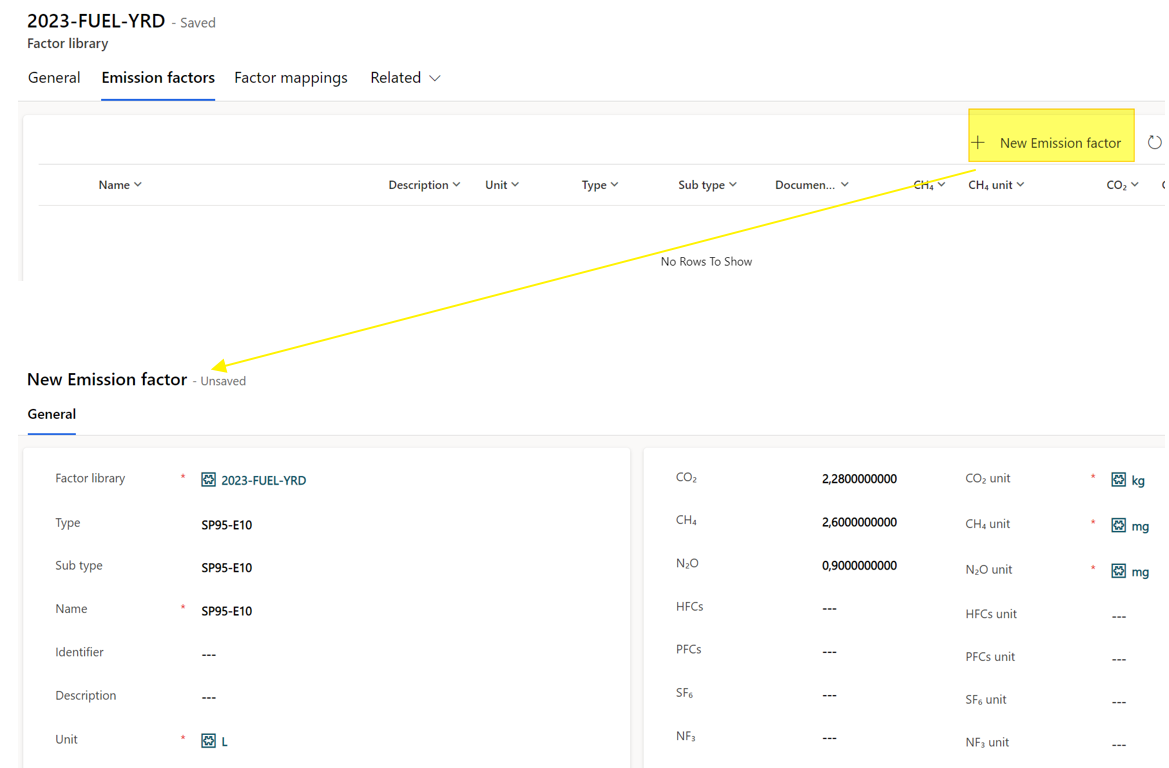
Now I’m creating a new custom factor library :

In this Factor Library I will add new Emission factors with the associated amount of CO2, CH4 and NO2 for 1 liter of fuel:
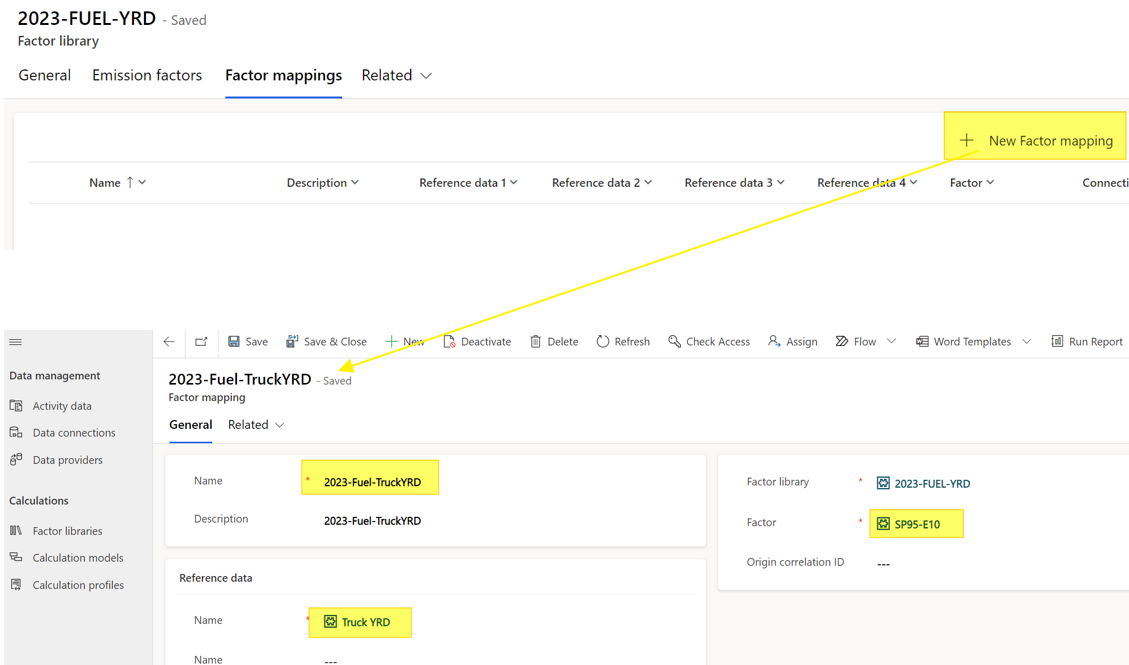
Then, I’m adding a new Factor mapping in order to link the Truck (Vehicule type) to the Fuel Type.
After defining this it’s time to create the Calculation model. This graphical object helps you defining the process of calculation. Here I want to implement a basic one.

When choosing the (+) icon, there is several available actions.
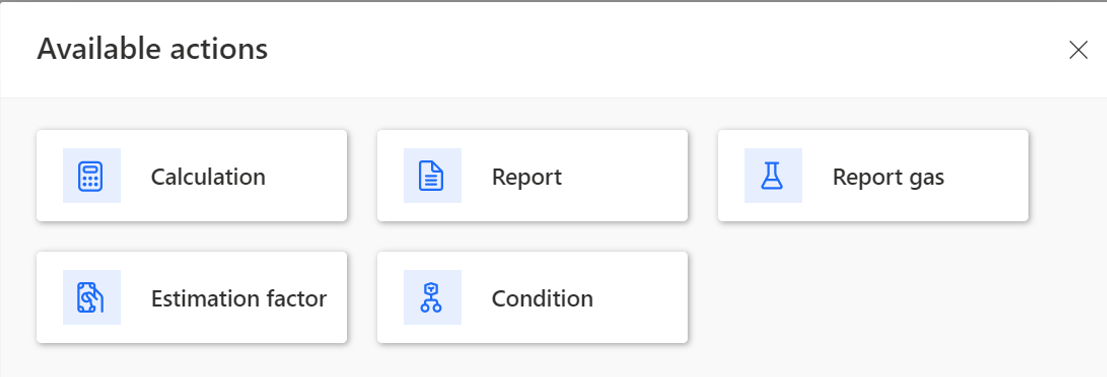
- Report : action to calculate and report carbon emissions
- Estimation factor : create an estimated value for converting one unit type to another in a different unit group)
- Calculation : to provide a calculation : + – / or * between one input and output unit
- Report gas : action to report from emission report value (cost, distance, fuel quantity, quantity) into a selected greenhouse gas – not tested so far
- Condition : to setup a conditional function
I made it simple for starting with only a report task.
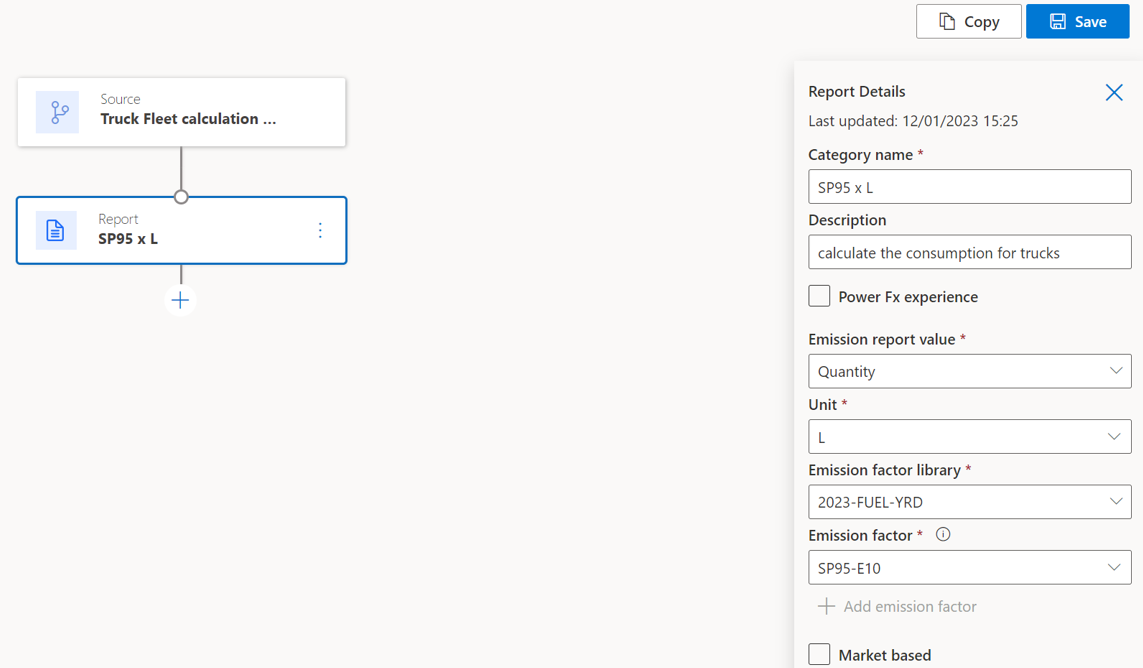
The new calculation model has been retrieved on the calculation model list.

The last setup to do is to initialize the calculation profil from the calculation model. Thanks to the wizard, you can define a name, associate the model and some filters.
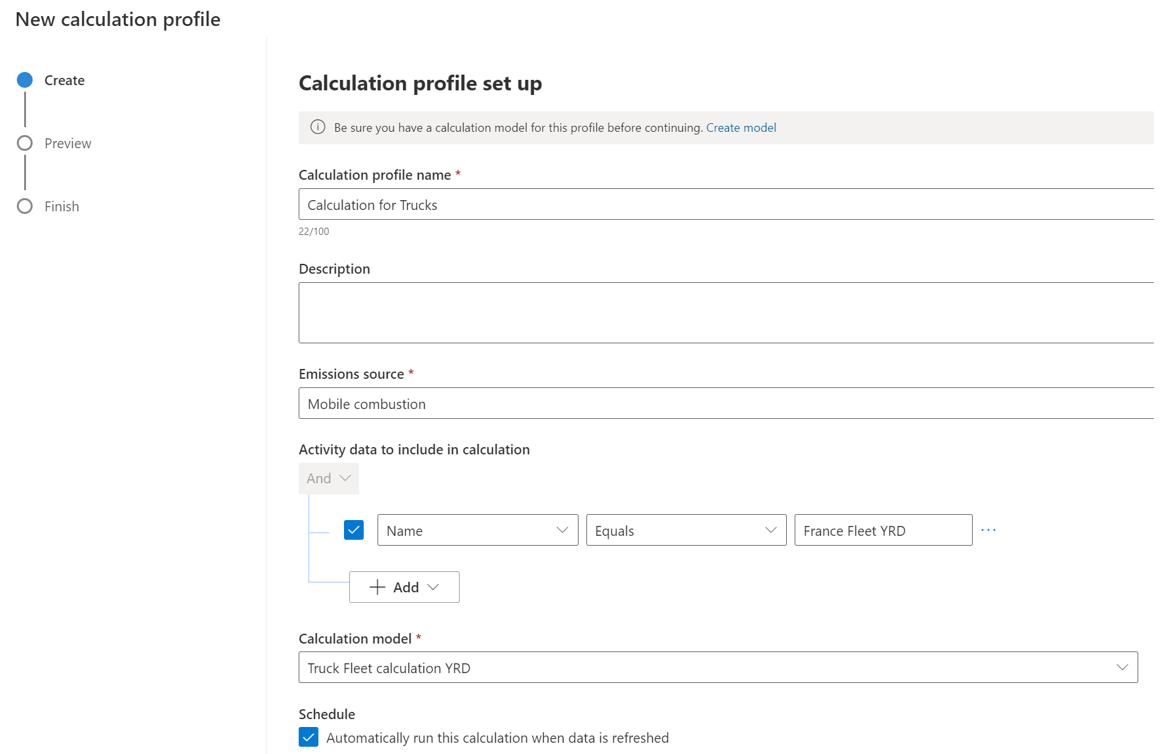
Now you can run it. It’s only manual unless the Schedule checkbox is ticked (see above).
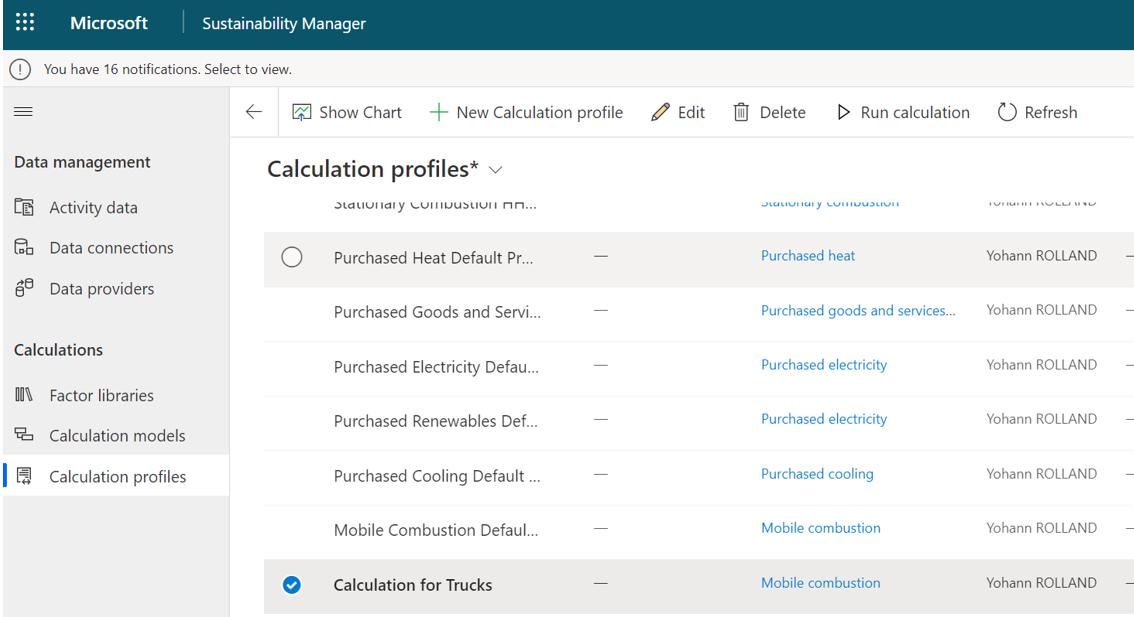
Dont’ forget to import activity data associated to the use case in order to fill the calculation profi before running the calculation.
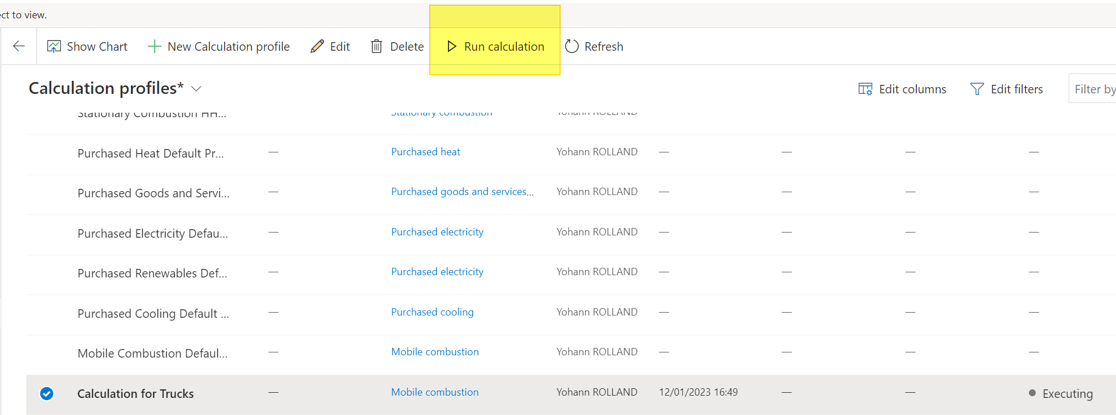
A status is updated continuously during the process. The history is visible on the right side of the list, which is useful when an calculation ends with “Completed With Errors”.
![]()
That’s is for the data calculation part. This will require times to do it properly for the first sources to deal with (especially when setting up customized calculation models and profils). If you are refering only to standard component it will be quite easy to use it.
Yohann


One comment