Version française disponible ici
I’m happy to have take part again to a quick ERP project deployment – 4 months for that customer – from beginning to Go live in January. The key success of this kind of project are:
- A consultant team unified
- A customer team involved
- No customization or very few
- Less than 30 users
- Defined scope in advance and kept it
The best part of that was my first D365FO – cloud – Go live, with advantages (you forgot your laptop at home but you can still work from any personal computer or laptop as long as you have internet) and drawbacks (technical team felt orphan without any AOT for running correction scripts, everything is managed by Microsoft for Production environments).
Even if the story ends with a happy ending (as always on Go live no ?), we have encountered some data integration issues…. Too bad we found them after the import of items and after the initial counting has been posted. When you have some transactions, it’s always difficult to change the item setup.
Here are some tricks and tips to help you on that.
Items with wrong storage or tracking dimension group allocated
When importing items you probably have used the Data Management workspace which has been really enhanced since the DIXF creation as an add-on in Ax 2012 R2.
When creating product and releasing it
For items we could have more than 10 files to import them (products, variants, released product, prices, bill of materials, default additional setting,…). Let’s consider we have imported a product, and allocated the storage and tracking dimension group from here.
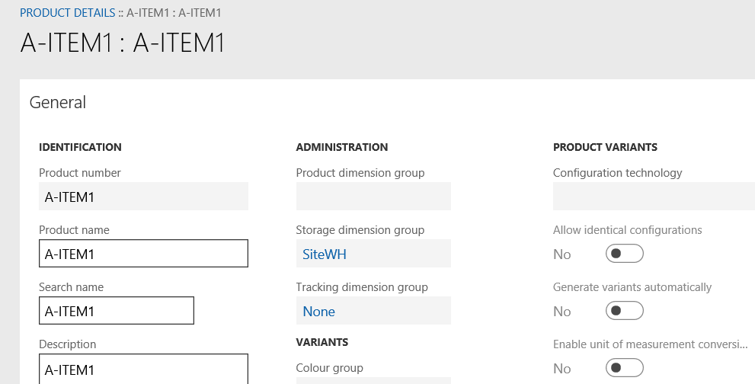
Then, the item has been released, with the appropriate entity. Item model groups, units, item groups… and the rest is setup.
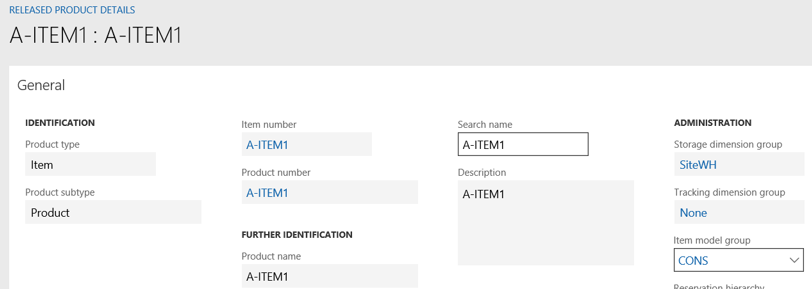
After that, you post the initial counting for that item : Inventtrans is impacted.

Suddenly, you notice there is a wrong setup on this item according to the tracking dimension group, your item should have been batch tracked.
The first thing to do is to cancel your counting.
Then, you know that you cannot change the Tracking dimension group from the released product : it’s greyed.
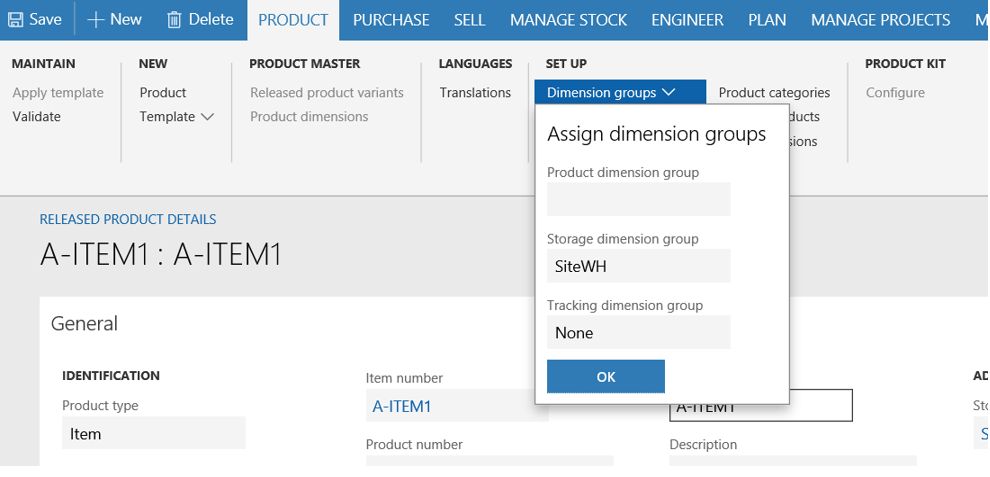
What you need to do is to go under your product, and from there, clear the Tracking dimension group.
![]()
Then, go back to your released product, and now you can clear the Tracking dimension group area
![]()
After that, go back to your product and choose the appropriate Tracking dimension group : batch in that scenario. The Tracking dimension group will be allocated to the released product automatically.
Don’t try to allocate directly the Tracking dimension group to the released product if the product has been created first : it won’t work.
![]()
From now, you can initialize your batch number, for your product.

You should be able to post the inventory counting with the batch number.
In some situation, you won’t be allowed to switch so easiely of Tracking dimension group (or Storage, it works the same way).
Sometimes, you should have this message when trying to change: activate closing of non-financial transfers’ is set to yes.

That is because your target Tracking dimension group has the financial checkbox enabled.
Another tips you can do is to create a specific Tracking dimension group with that checkbox disabled and repeat the previous procedure for product allocation. Then, run the procedure another time by clearing and allocated the correct target Tracking dimension group (with the financial checkbox enabled) : that will work ! Wonderful.
In a different context in which you have been live for a long time and you want to change tracking or storage dimensions, you may encounter this message too. Try then to run the inventory closing to solve this.
When creating released product directly
Let’s test the following scenario: the item has been directly created as a released product through the Data Management workspace.
You should know that creating directly a released product create instantly a product. The only thing is the Tracking and Storage dimension groups will be blank defaulted for product (even if they are correctly filled for the released product).
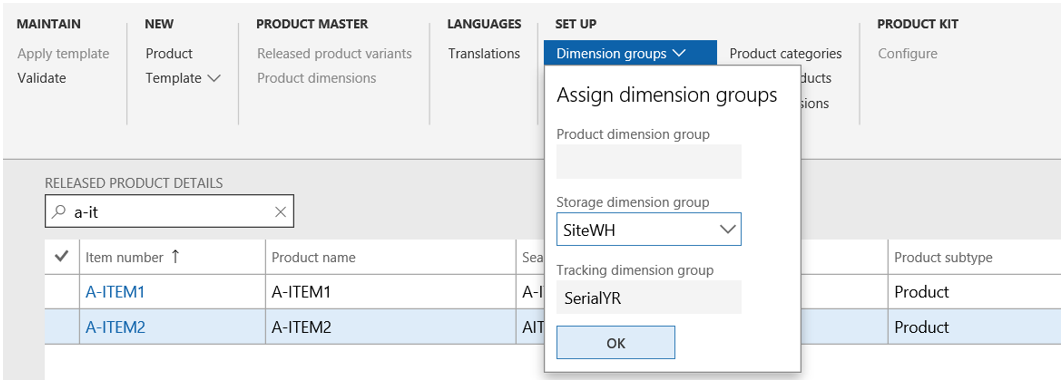
What you need to do for updating the Tracking (or Storage) dimension group for the released product after having posted some transactions is:
- Clear the Tracking dimension group from the released product
- Default the appropriate value on the product: it will populate the new value (and greyed it) for the released product.
Item setup with the wrong Product subtype
Here is a more complex situation : the item has been created as an Item Product type instead of a Service one. With a first counting posted it’s impossible – as far as I know – to update the Product type. More, even if there is no transaction at all, you cannot change this. You need to delete the released product and the product.

If the codification of the item is important, meaning you need to keep the item number as it is, you should consider to rename the wrong one and import it again correctly.
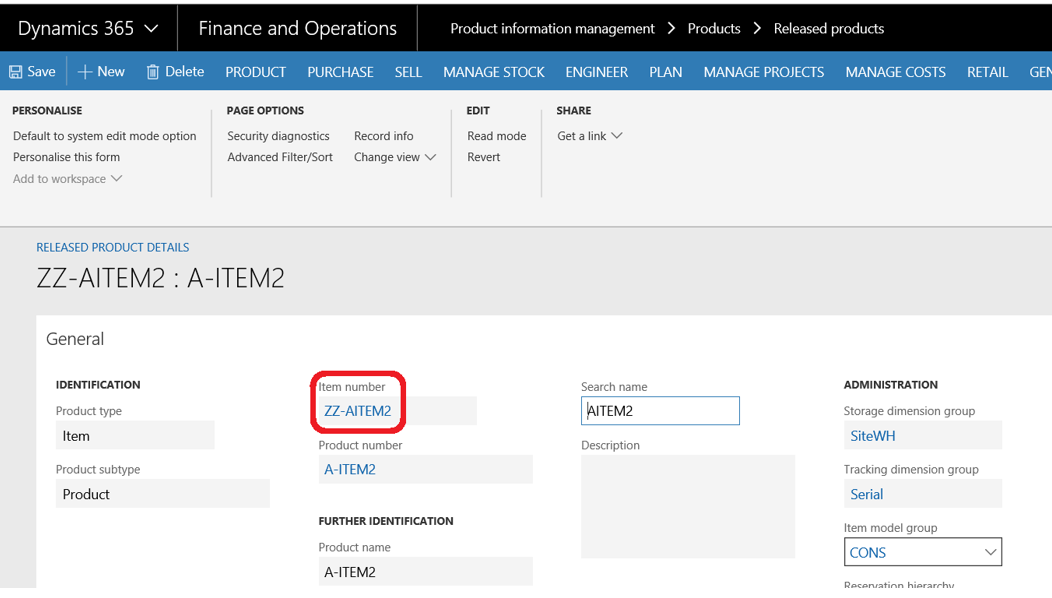
How can you achieve this? For the released product, go into the Options tab and use the Record info field to rename it. That’s quite easy.

As you can see, I have now renamed the released product.
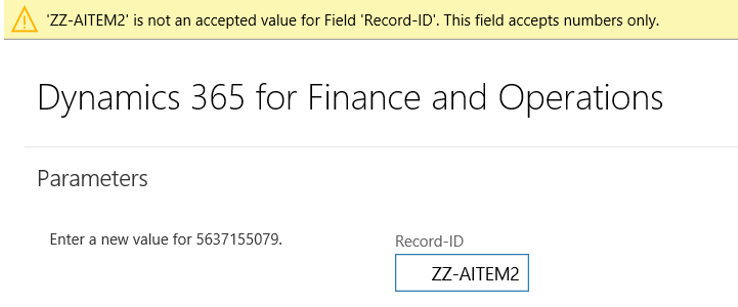
About the product, it’s more complicated. If you try to do the same process, you will be stucked because of a RecId so you cannot use that.

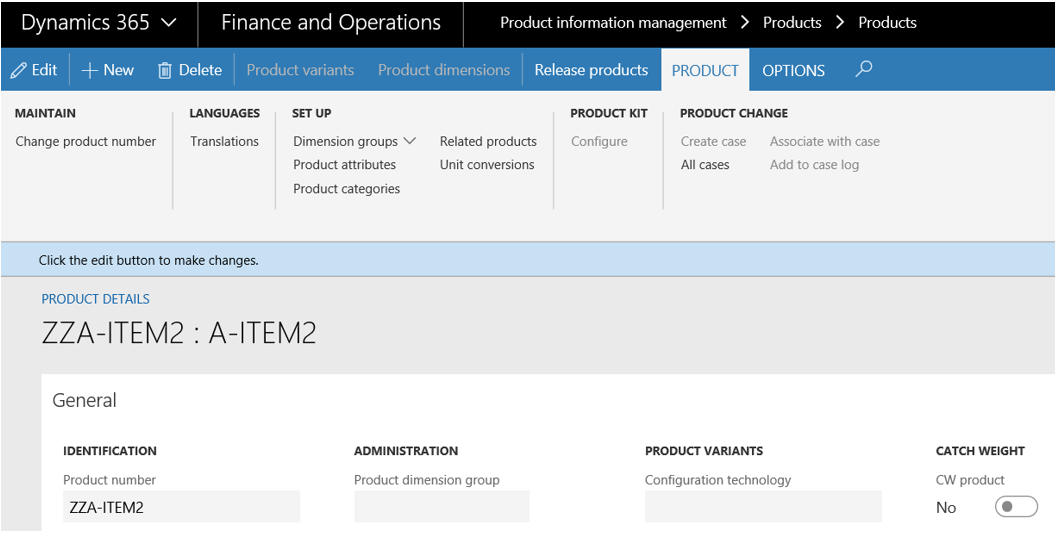
Here is a thing, a very good tip you may know, or not. It’s really in front of you, but sometimes you cannot see it. Open the product itself, you will see the Product tab is updated and the Change product number option is then displayed.
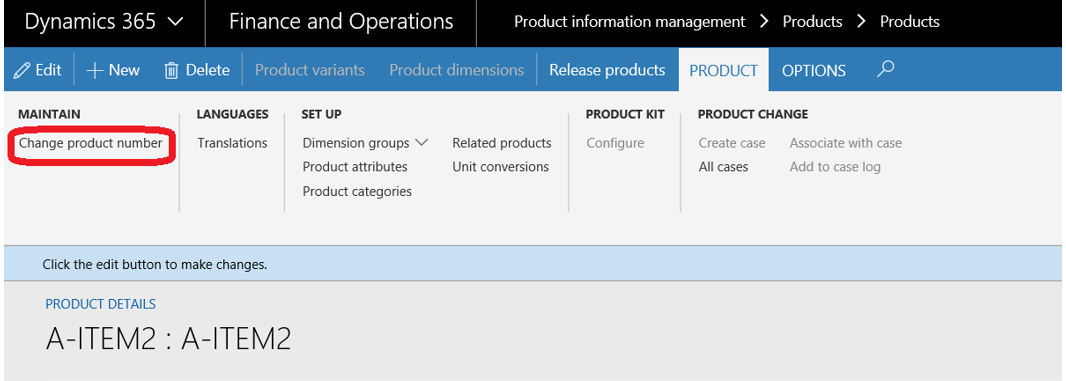
So use it! That’s it.
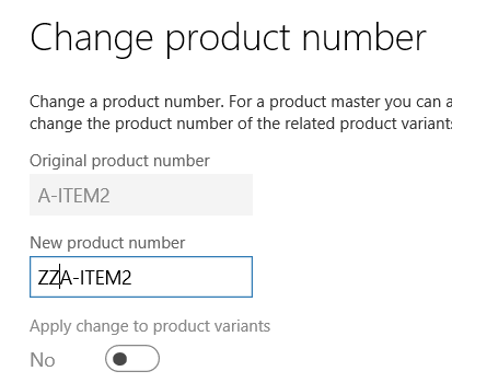
Now the product number and item number have been renamed so you can import again the product, with the correct values.
And next time, try to run some additional tests on data recovery in the test environment before discovering it in live, but that is another subject.
Until next Go live…
Yohann ROLLAND
Thanks to my colleague Anthony VACHON who was in charge or data recovery and discovered and solved those issues, and to the whole team who made this go live a success.


5 comments