

In this post, we will deep dive on full D365 Supply Chain functionality regarding the process of identification and creation of vendors. This applies more on some service businesses when there is a lot of vendors to manage and when we would like to give to our vendors some access to the collaborative portail for them to be able to process purchase orders and manage requests for quotations.
This process is not very complicated to setup but implies workflows, azure connexions, and will deal with different status of the vendor (from prospect to vendor).
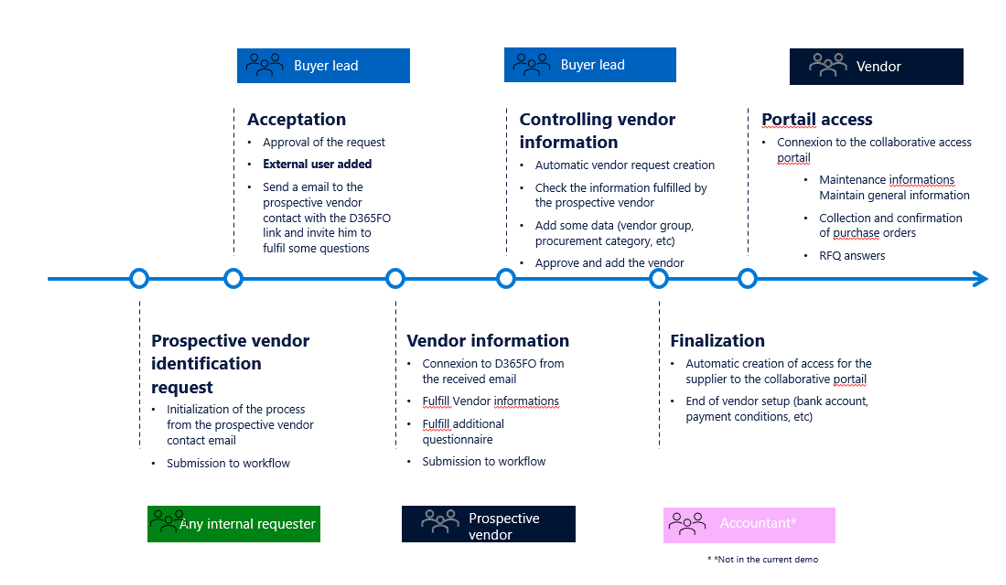
Process
Here is the process we will approach. As you can see, it starts with the initialization of the request by filling the contact of the new prospect vendor (with external email). Then the first workflow aims to validate the first stage by creating the guest access to this new user, but only with an external access limited. Then, the prospect vendor is invited to fill some mandatory fields and possibly complete a questionnaire. After submitting to a new workflow, an internal buyer lead will control and validate. This will add some new role to the user and create the vendor record. After that the vendor is able to access to the portal.
Setup
Some setup has to be done, we will have a look on that.
For email to be sent, you need to ensure that all email parameters have been correctly setup. Check with an IT guy under :
System Administration > Setup > Email > Email parameters
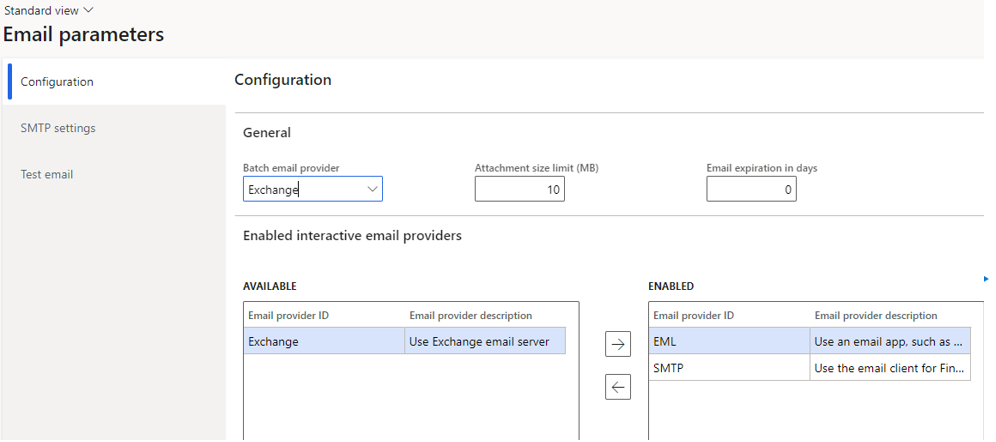
You can test the emails by running the Test email option.
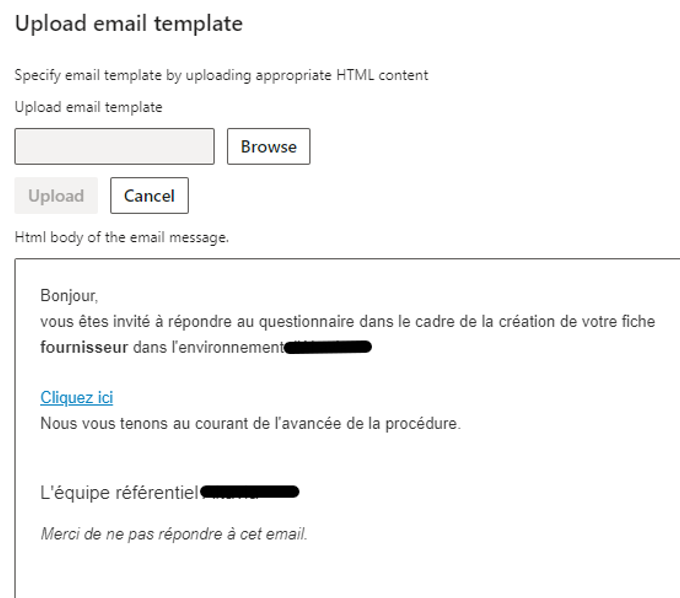
When you will invite the prospect vendor contact, you will send an email to him. Make sure to have one email template done by importing an html file.
Consider using this code to have a beautiful link with the D365FO environment in link :
<a href= »%portalurl% »> Click here to access </a> <br>
For the template email, go under System Administration > Setup > Email > System email templates

Then choose the import email template option.
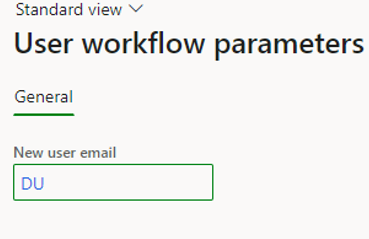
Don’t forget to link the template you want to use for the user workflow email under System Administration > Workflow > User workflow parameters
You will also need to setup the user workflow (platform) available under System administration > Workflow > User workflows
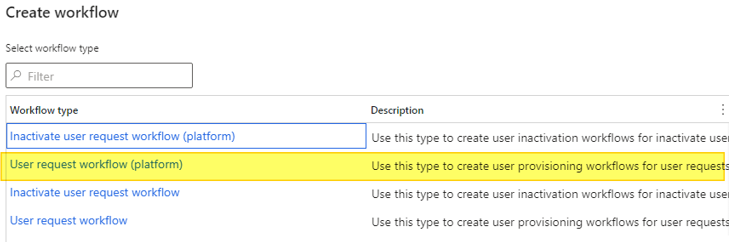
Note : (platform) means external.
This worklfow will be used for 2 steps of our process :
- when adding the contact as a user
- when converting the vendor request as a real vendor, and adding the appropriate roles to the user
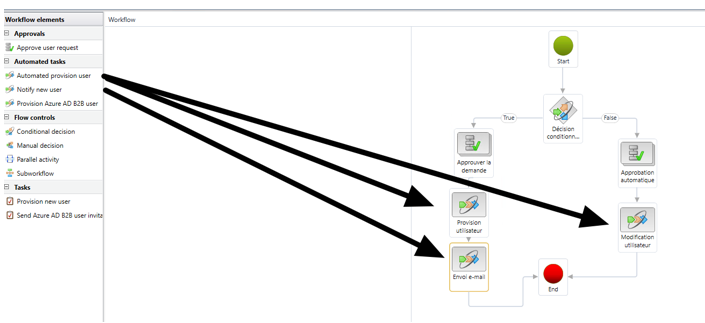
I have used the automated tasks to provision the user, the notify new user to send an email.
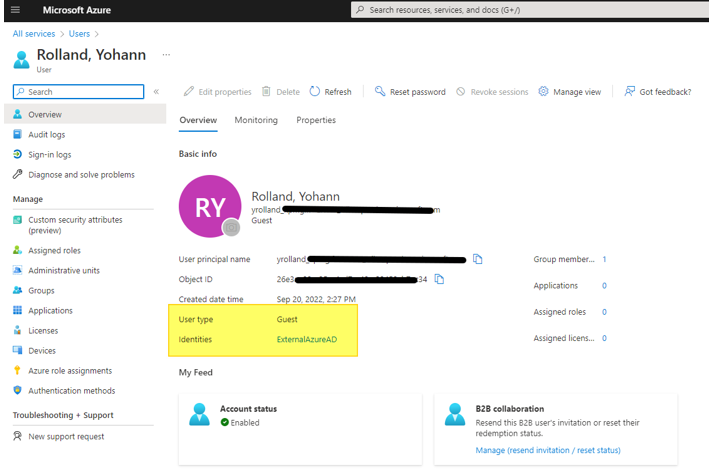
I haven’t used the Provision Azure AD B2B user, because I have added manually it into Azure. This is the part in which you will need support of an IT for managing AAD access. The internal policy have to authorized this process of addition otherwise you will need to do it manually.
As you can see I have added the external email in advance as a guest for this demo purpose.
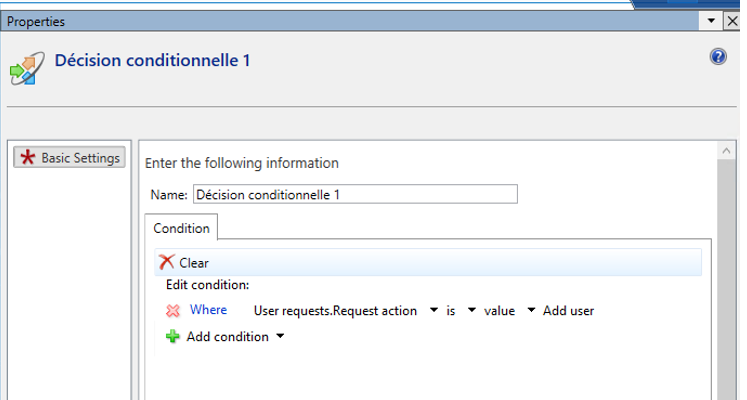
Regarding the conditional decision I’ve put, it’s just to check if the request was to add a new user or update it. Then it redirected on the correct way of the branch. For me it’s was just about automatically approve or manually approve the task.
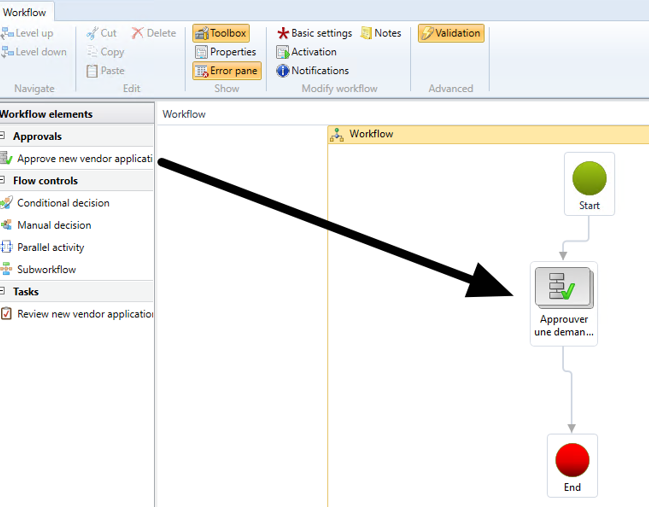
Another workflow has to be setup under Procurement and sourcing > Setup > Procurement and sourcing workflows.
It’s used for the final step of our process when adding the vendor.
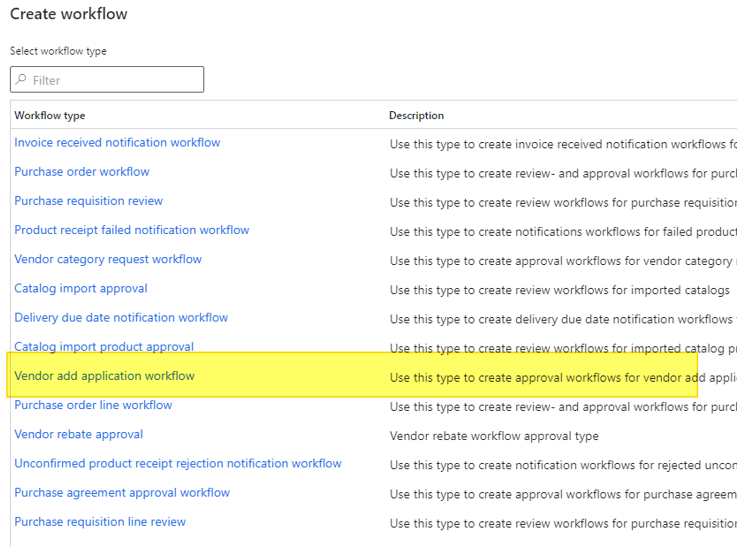
I’ve just put a simple approval workflow here.
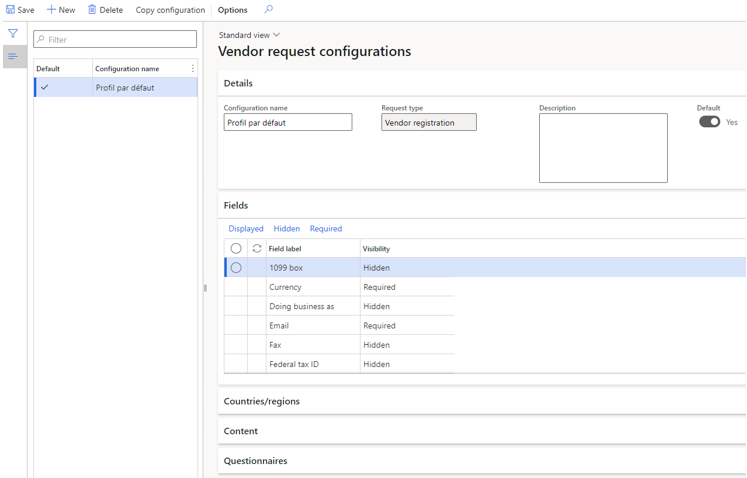
Some procurement setup has to be done under Procurement and sourcing > Setup > Vendors > Vendor request configurations.
Here you will hide, display or make mandatory the fields you want your vendor contact to fulfill. You can also add a questionnaire to complete the process.
Now you will finally activate the required batch for emails and workflow and you’re done for the setup.

One last thing to know, if you want to demo this, you will need several accounts to process it (3 to 4 different, including an external access).
Overview of the process
Step 1 – initializing the request
Connected as a project manager or any other role, I want to add a new vendor. For doing that I’m going under Procurement and sourcing > Vendors > Vendor collaboration request > Prospective vendor registration requests and add a new contact, by filling the first and last name, the organization type and the email which are mandatory.

I’m saving and clic on Invite user. The first workflow is launched.

Step 2 – Approving the request
Connected now as the lead buyer profil, which is setup to be in charge of the approval of the user workflow, I’m having a look at the workflow notification
I’m approving it.

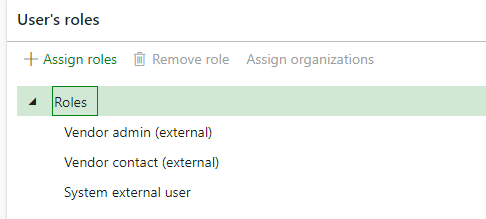
You can see the role identified. At that stage in Vendor prospect (external). You cannot do much with that role, we will see that in a while.
Step 3 – Fulfill the wizard
Now I’m switching to the external propect vendor. Having a look at my email box, I’ve received a new email inviting me to connect to a link for filling some questions.
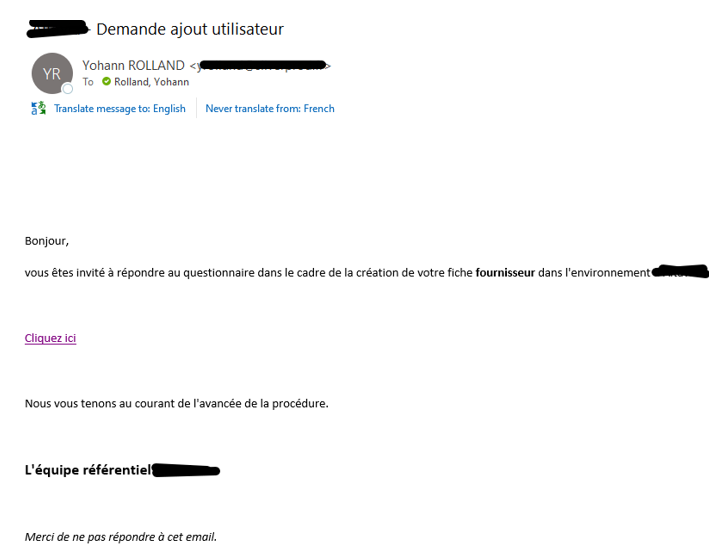
I’m clicking on the link and I’m invited to connect with my external email and associated login to the D365FO of my customer.
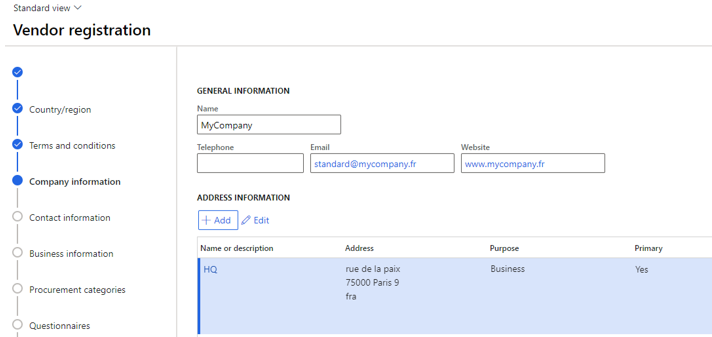
In fact, it’s a wizard displayed and I need to fulfill and move on step by step.
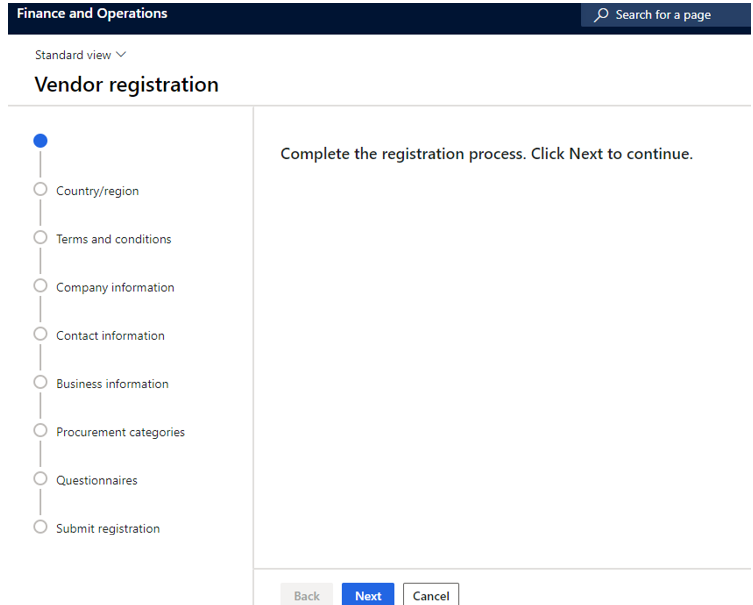
Some mandatory information and facultative ones are available. Here the company address, identification, etc.
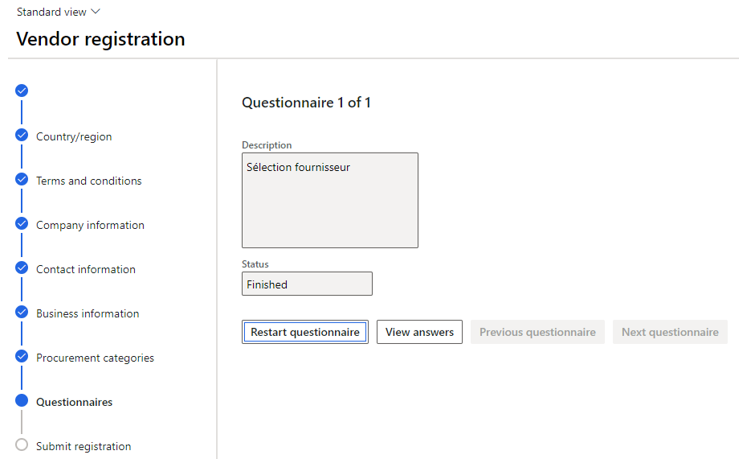
At the end, a questionnaire is displayed and I’m invited to complete it.
Note : I haven’t focused on the questionnaire setup in this post, but it’s something quite easy to setup.
After that, I’m submitting my registration and I’m done for now.
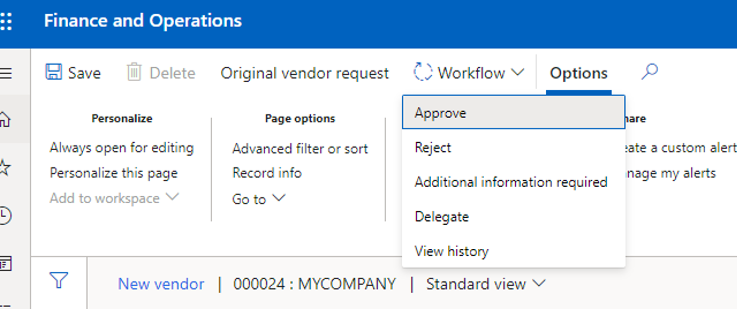
Step 4 – Control and creation of the vendor
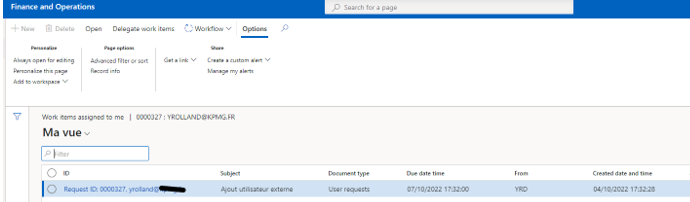
Going back to my buyer lead account, I’m looking at a new workflow notification.
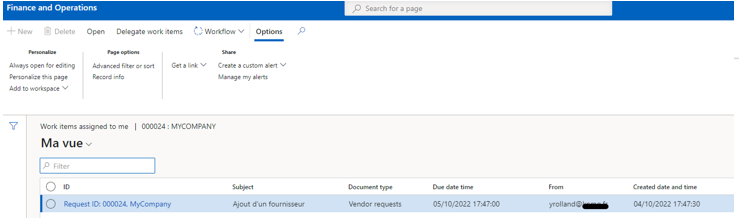
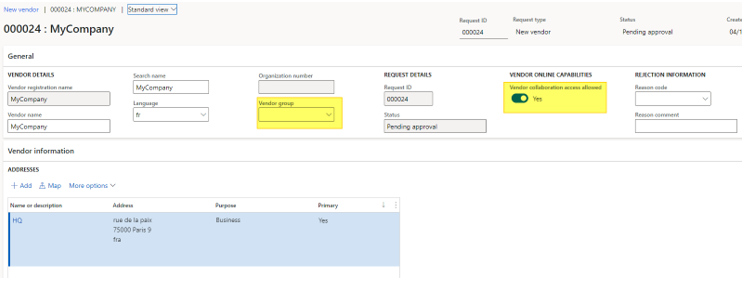
I’m checking each fields setup by the prospective vendor and adding the vendor group which is mandatory for creating a new vendor.
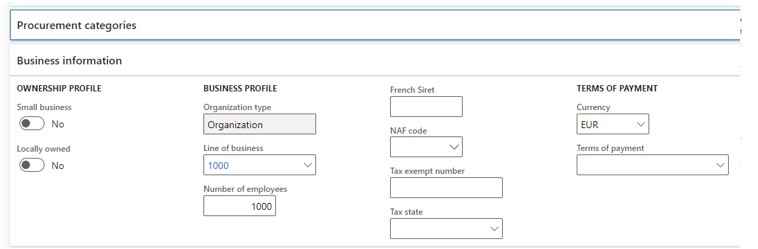
I can also add some additional field such as procurement category assignment for instance.
I’ve make active the vendor collaboration access which is important if you want the vendor to be able to communicate with you through the portail.
Having a look at the other fields available in the vendor request record.
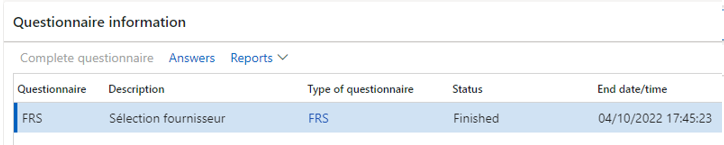
And finally you can check the questionnaire reports (answers, scoring, etc).
At the end, I’m approving the workflow.
Finally, the vendor is created and you can retrieve it under the vendor list form.
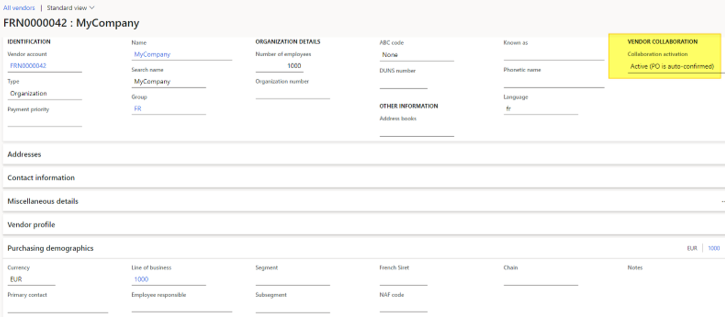
Notice the collaboration activation is setup to yes.
In the contact link you will find the initial contact filled at the first step of the process.

And the associated external roles.
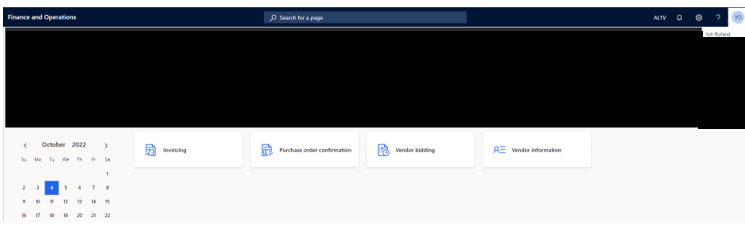
Step 5 – access to the collaborative portail
That’s it. Now I’m taking back my vendor profil with the external mail I’ve used for fulfilling the wizard, but now I can do much more that previously and I can interact with my customer through the collaborative portail.
Wonderful, isn’t it?
Yohann