
The Production Floor Execution is a useful embedded tool available within Dynamics 365 for Supply Chain Management for any employee who has time and attendance tasks to execute, or production route operations to follow up.
Some customers require Manufacturing Execution System (MES) functionalities embedded with their ERP Project. There is an out of the box prebuild interface which will facilitate integration with third-party MES (a dedicated post will follow)
On the other hand, Dynamics 365 for Supply Chain Management offers some MES capabilities thanks to Production Floor Execution. It’s a specific and generic interface optimized for field technician experience which doesn’t require a user specific license but a device license (up to 10 generic users).
You can easily clock-in/out the real time dedicated to every operation of the route for any technical employee, indicate correct quantity manufactured, errors, and so on. Also, you can backflush consumption of raw materials, and synchronize in real time with Dynamics 365 for Supply Chain Management production, picking… journals related to the production order.
Limitation regarding a MES best of breed are the following: you cannot directly follow up feedback from production machines (but you could achieve it with IoT chip card connected to the Dataverse) and an out of the box dashboard for production monitoring are not as relevant as a specific MES (even if you can provide Power BI reports).
The purpose of this tutorial is to help you getting started with Production Floor Execution for the basic setup. Here we go.
Setup Employee
Any new Production Floor Execution has to be identified as an Employee, so create a new one. Clic on Activate on registration terminals.
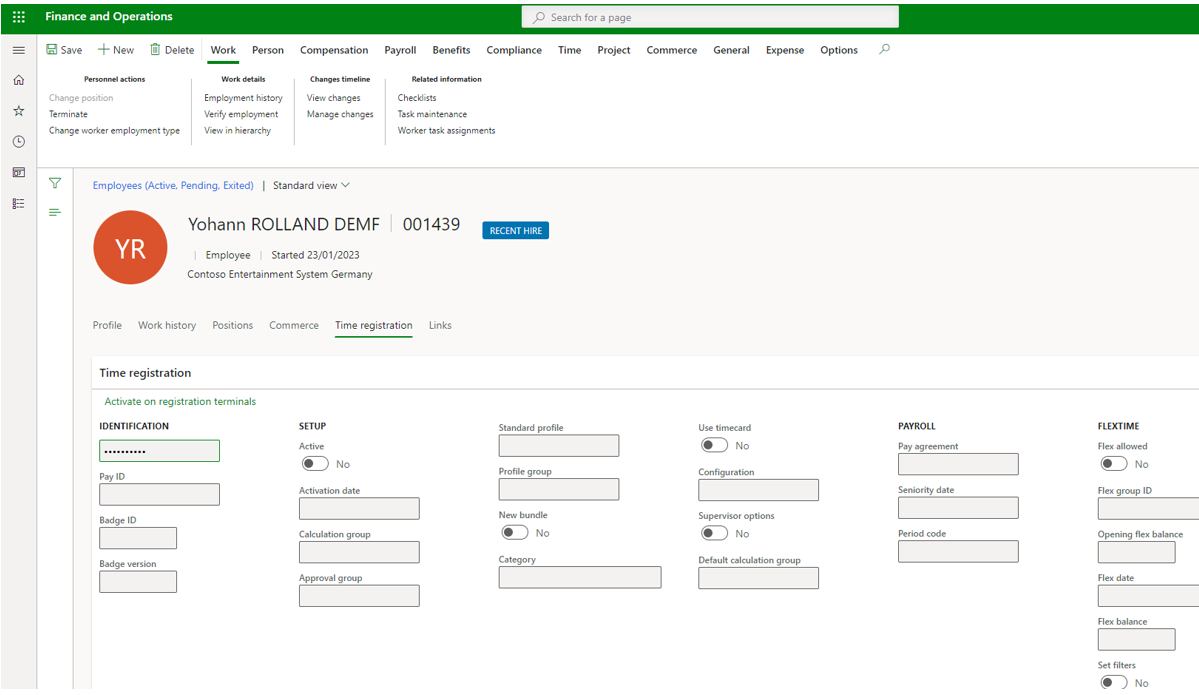
You will be able to fill some field. You need to have one value for Calculation group, Approval group, Standard profil, Profile Group. You can put a dummy value if you want to move on quickly.
Don’t forget to setup Set Filters to Yes because otherwise you will not be able to use filters on the device.
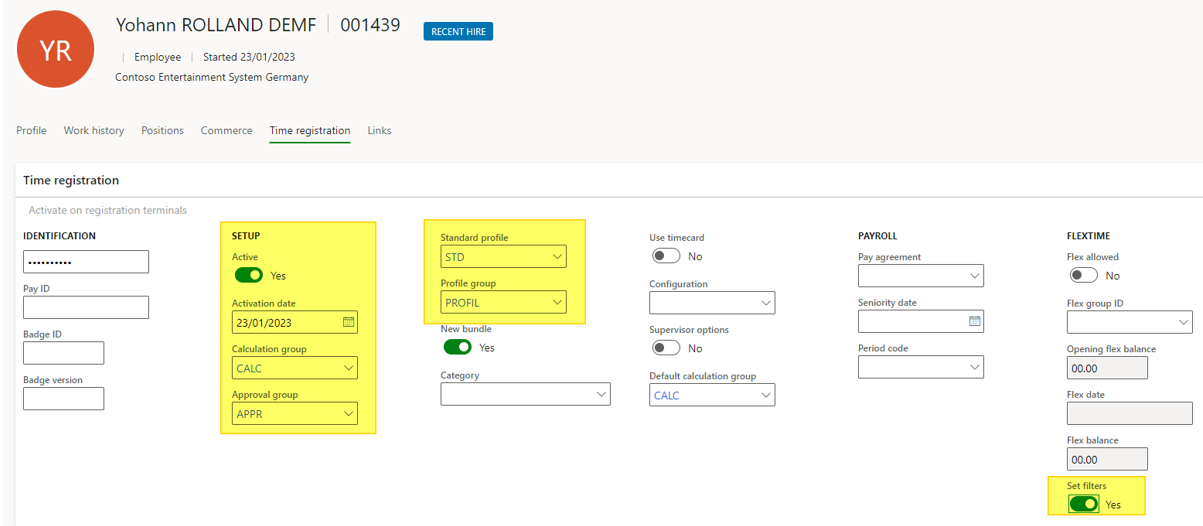
Note the personnel number which is the one used for any connection to the Production Floor Execution. In my situation : 001439.
Time and attendance
The next step is to run the following wizard : Time and attendance > Wizard > Time and attendance configuration wizard
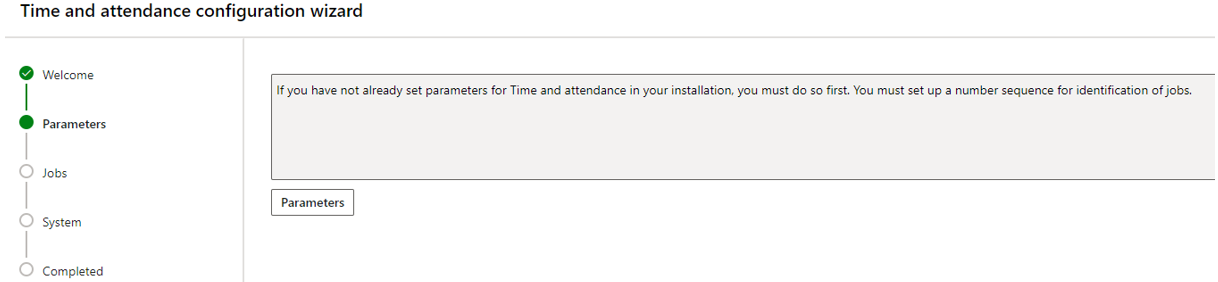
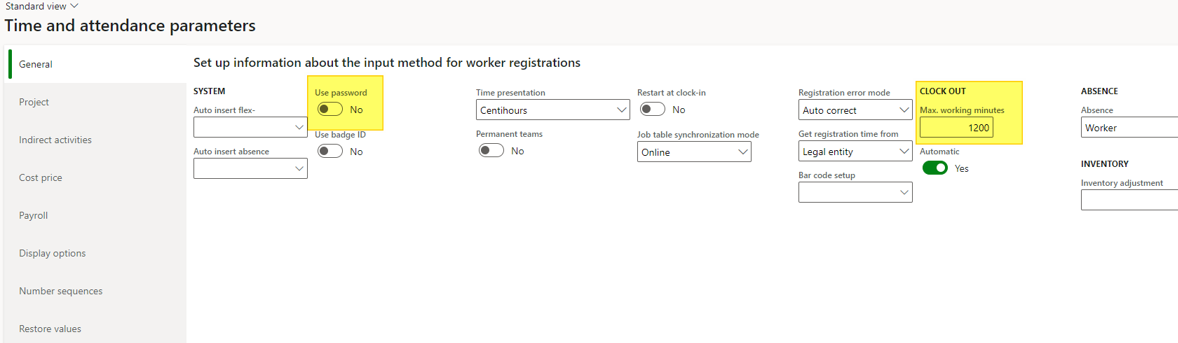
Step 2 Parameters
After clicking on Parameters, you are invited to setup the General options of the Time and attendance module. Here I’ve highlighted only two important ones : usage of the password or not, and the maximum working minutes (it will automatically clock out after 1200 minutes)
Going back on the wizard, you just need to proceed it until the end.
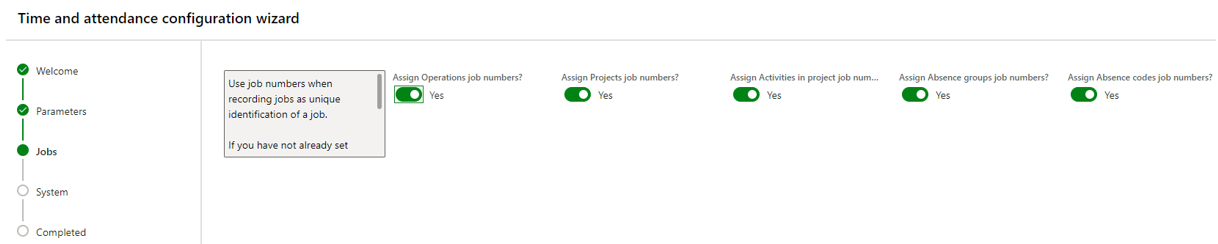
When it’s done (click on Finish for the last step), you can move on to adjust Production Floor Execution parameters.
Manufacturing execution
Go under Production control > Setup > Manufacturing execution > Manufacturing execution parameters and fill the global setup (pay attention to journals to use if needed during the production process).

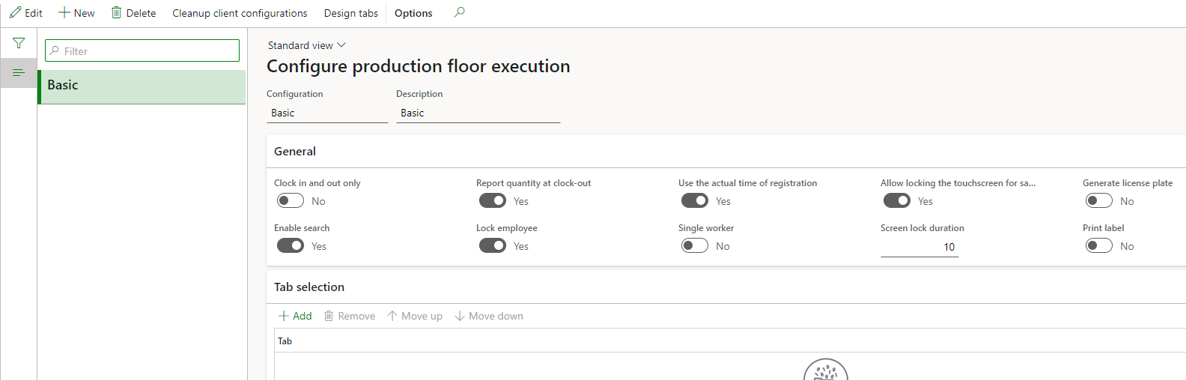
After that, it’s time to setup the interface of the Device. Go under Production control > Setup > Manufacturing execution > Configure production floor execution
Clic on the Design tab and drag and drop any actions you want to run for the primary and secondary toolbar :
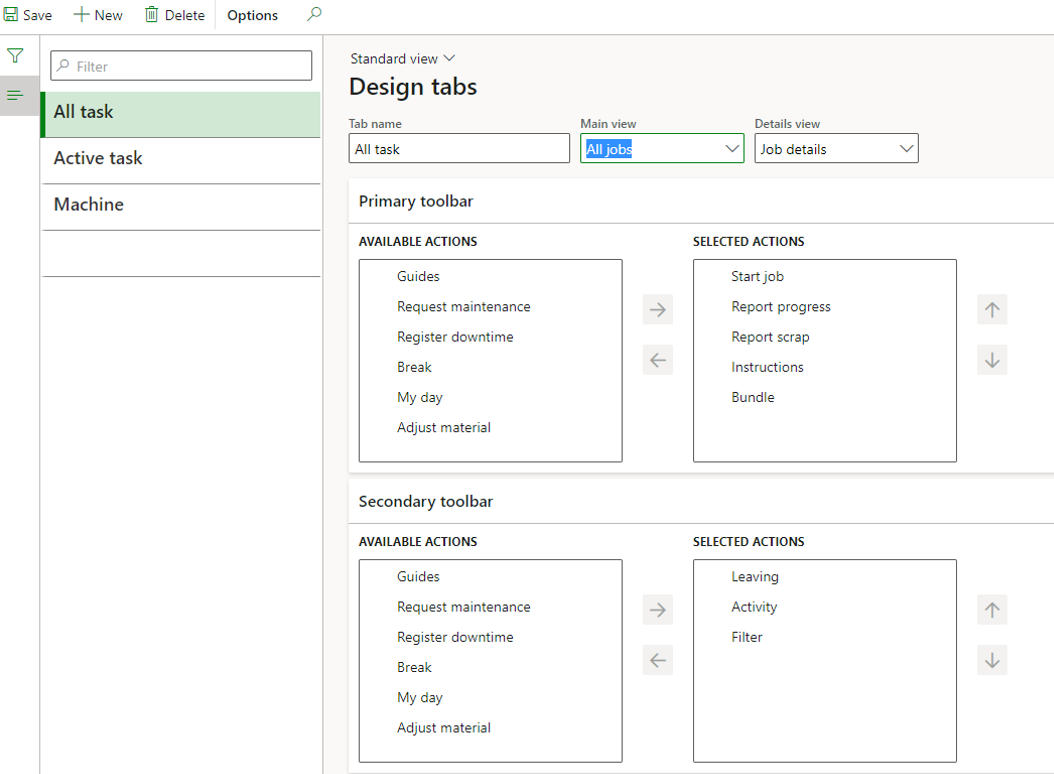
Pay attention for the Filter action : The production floor execution interface only shows the « Filter » button to workers whose accounts have the « Set filter » option enabled on the « Time registration workers page
Don’t forget to add the tab selection you want to display and use.
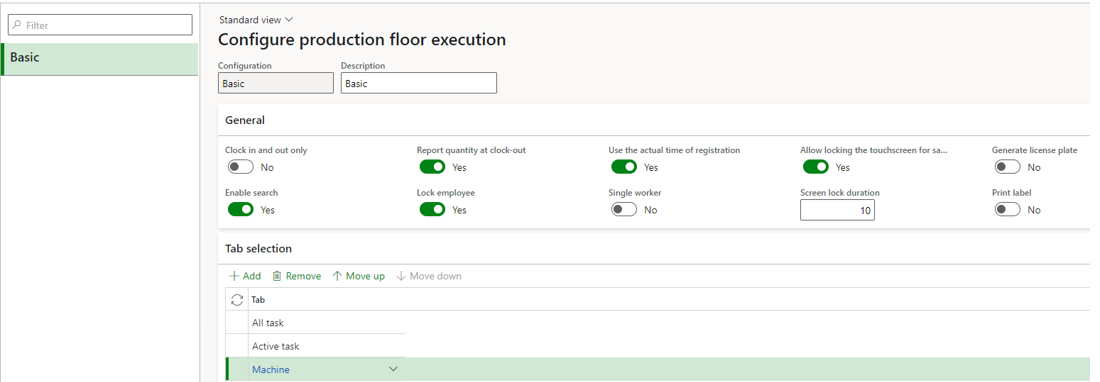
That’s it for the design. Note that it’s a global setup applicable for all users within the same company.
Behavior applying to Production Floor Execution
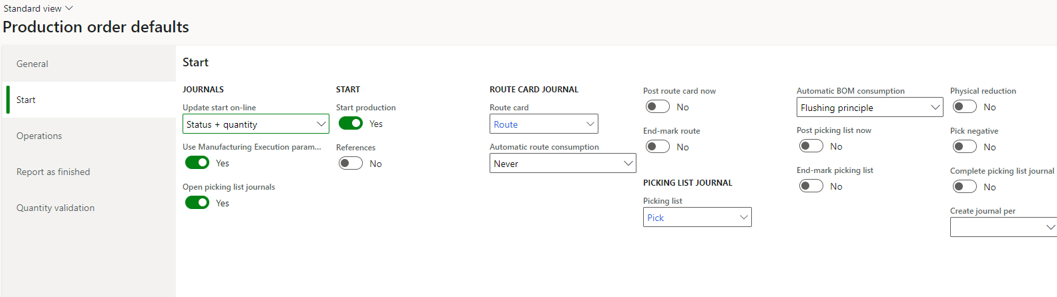
Finally, the most important setup regarding the behavior of the device on production orders is the Production order defaults form (available under Production control > Setup >Manufacturing execution > Production order defaults). You will define the posting rules, the journal to use… for each lifecycle step of any production order processed within the Production Floor Execution from Start to Report as finished.
Illustration of an example for Starting action :
Run the device
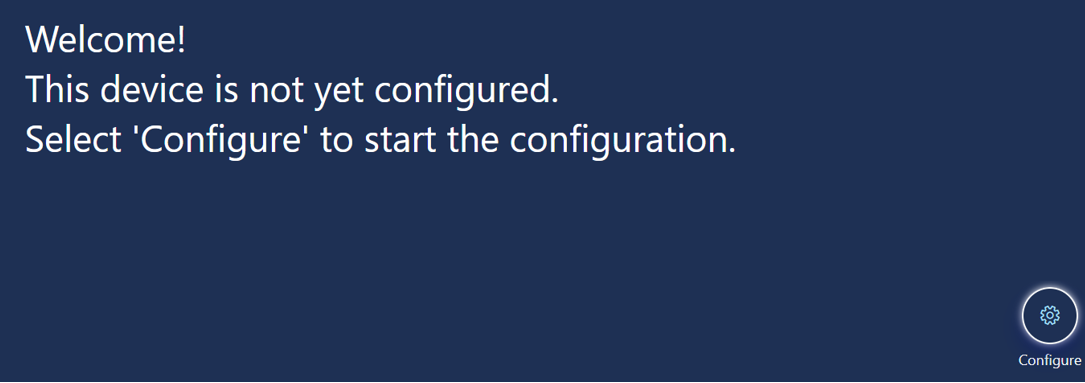
Now it’s ready to be tested. Note that in most of the case the Production Floor Execution is run on a tablet or on a shared computer as it requires only Device license (named users can have also an Activity license).
Go under Production control > Manufacturing execution > Production floor execution
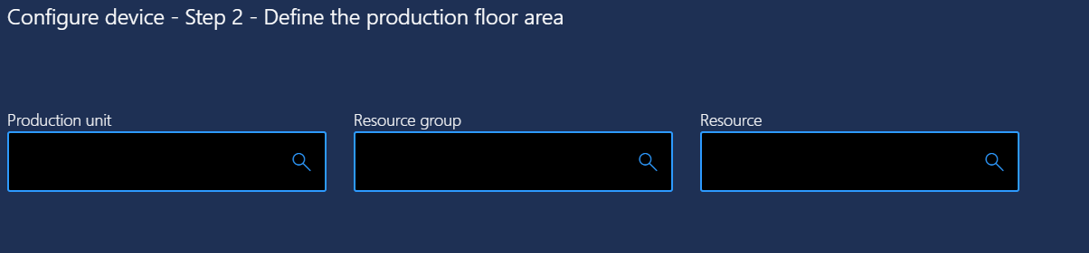
The first time you run it you will have to select Configure button.
Choose the configuration you just made.
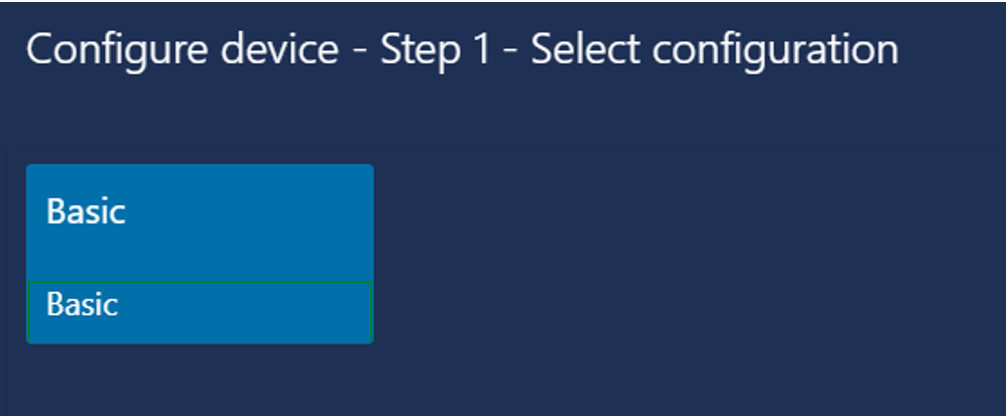
You can setup default filters which could be very useful in multiple cases.
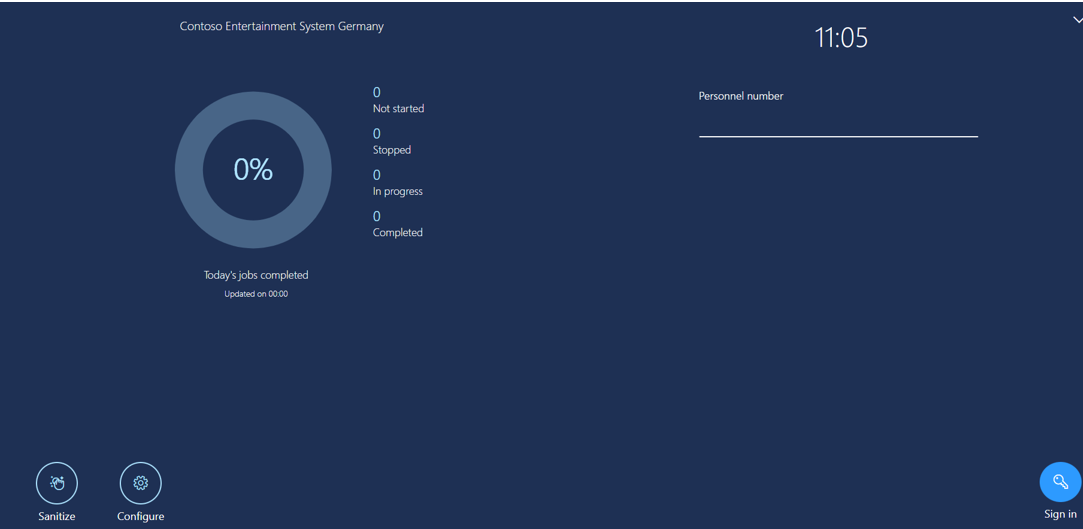
Then, you can authenticate yourself. Fill your personnel number (and password depending on the setup done previously) and Sign in.
There you go ! You can retrieve on the left and right part the two toolbars, and on the top the tab selectionned.
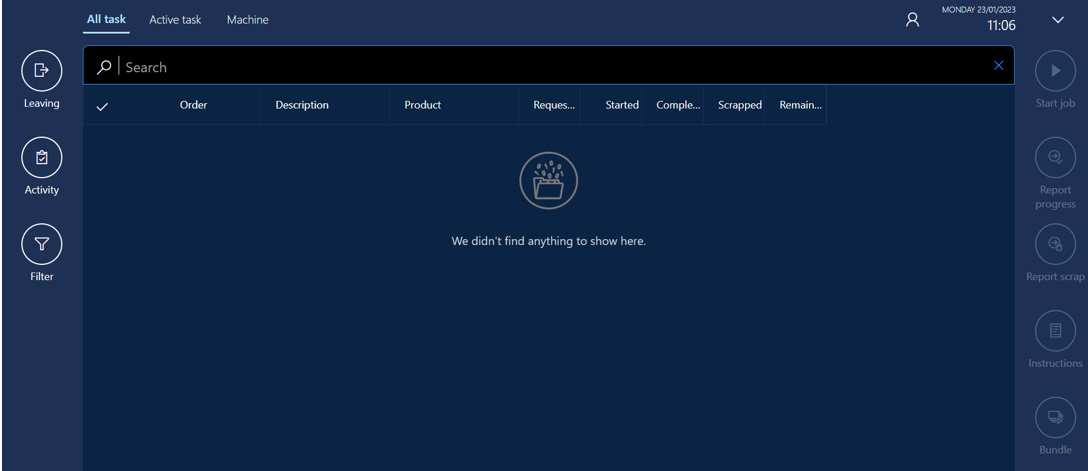
That’s it, you can now use it for running your production orders or batch orders (even if I’ve noticed some issues with batch orders according to how it’s works with production orders).
Yohann